Week 1
In this first week of the project, I have been collecting references, building mind maps and researching the game and lore of my chosen theme. Although I have not played any of the theme options, I am interested in the gothic tech style which is why Warhammer 40k is a perfect fit for me to develop a cathedral dungeon level for.
I have found that PureRef has been really useful to bring together images from research, because it has a huge area and maintains the resolution of the images when viewing images close up. Research and idea creation is a critical part of the game art work flow and I have found that PureRef has helped to define my research and organise it.
Through my research I have started to understand the elements of Warhammer 40k and I have created a mindmap to explore ideas for the environment. I have decided to create a design influenced by the Space Marines and possibly a hint of their enemies. I want to produce a dark, devasted space where gothic architectural pieces surround the player’s character. Even though it will a top down perspective I want to try to get the sense of a huge scale.
I researched gothic architecture and was inspired by the features in the images below.
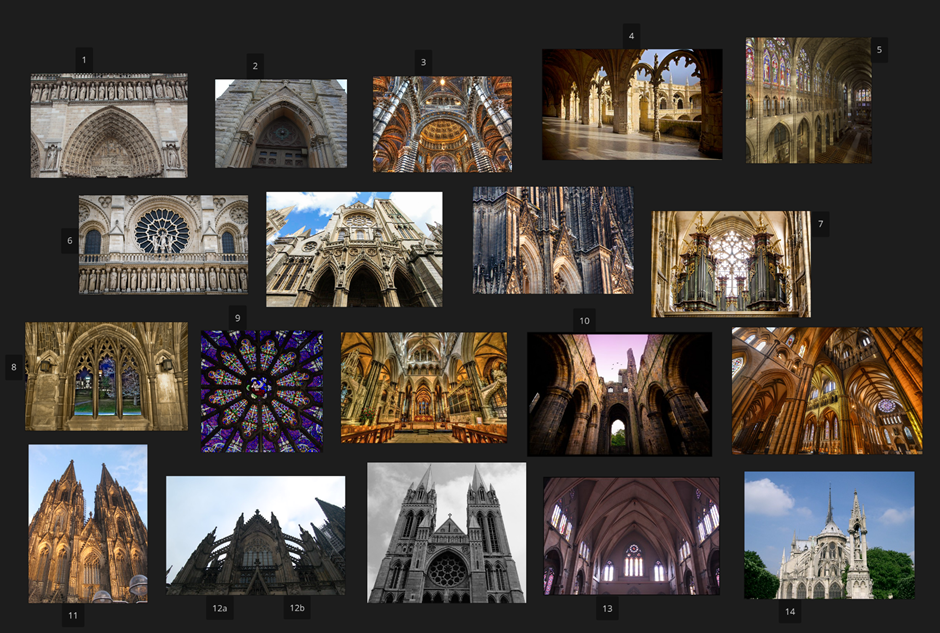
1 The sculptures engraved in the centre of the archway show a statement of powerful figures, and I could implement this type of design within my dungeon, reflecting the religion, beliefs and symbols from the Warhammer 40k.
2 The symbol on the top of the entrance shows me that I could use iconography within my door design.
3 I added this image of Siena Cathedral as its shape and colour palette gives off a steampunk aesthetic and reflects the Space Marine design.
4 The image of the pillars and columns connected by the cut-out arches is a great inspiration as it is sculptured in the Gothic style, and I could create a design in the arch that uses Warhammer symbology.
5 I chose this image as it is a good reference for size and scale for when building the level environment.
6 The pattern on the window seems in a gothic and regal style, which would be great inspiration for the window in the dungeon.
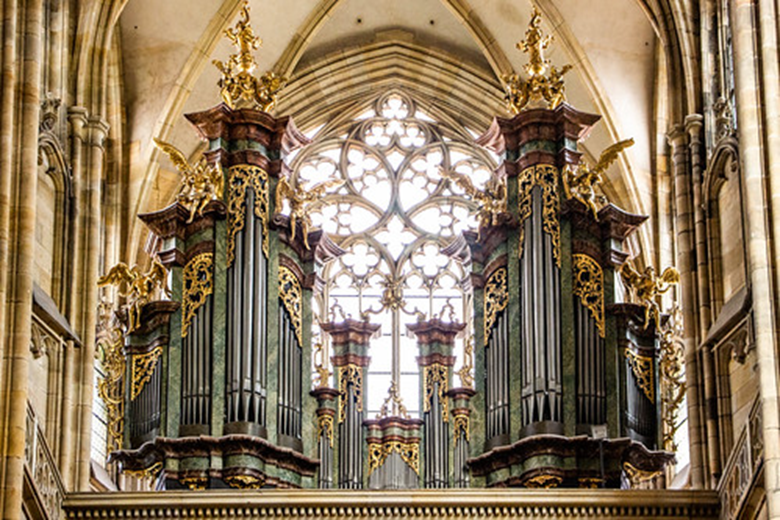
7 Angelic design of an organ with a stature which I could see would make great inspiration for the shrine.
8 This shows a Gothic window cut-out, which would hint to the player of the world outside.
9 The gothic rose stained glass window draws your eye to the centre. It uses strong symbolism, and I am considering how to use this feature in my scene.
10 I chose this as it represents the way that buildings deteriorate over time.
11 The cathedral shows that each layer has ornamental detail, with the idea that there’s a reasoning behind that. Warhammer
12a The picture was chosen for its imposing structure, and I want to reflect this feeling and powerful look within my dungeon design.
12b I also chose the picture as it has the stone workings of the cathedral with some metal scaffolding, and this mixture evokes ideas of structures being preserved, evolved and built on just as they do in the 40k universe.
13 I am interested in the light beaming through the windows; the windows would have been designed to allow a ‘godly light’ to beam down from above, and I want to implement this type of design in my cathedral.
14 The design of the cathedral has prominent curving shapes in a symmetrical, industrial feel. Similarly, the metallic reflection from the top spire gives me an idea of a metallic-stone material.
I liked the idea of photo bashing and I would like to try that in future projects.
Bibliography
Giuroiu, A. (2024). Gothic Architecture: Characteristics, Influences, Ambassadors And Sights. [online] Architecture Lab. Available at: https://www.architecturelab.net/architecture/styles/gothic-architecture/ [Accessed 23 Jan. 2026].
Hall, A. (2025). The Art of Warhammer Video Games. Dorling Kindersley Ltd.
Notre-Dame de Paris. (2024). Interior Architecture – Notre-Dame de Paris. [online] Available at: https://www.notredamedeparis.fr/en/understand/architecture/interior-architecture/.
Victoria and Albert Museum (2019). V&A · The Gothic style – an introduction. [online] Victoria and Albert Museum. Available at: https://www.vam.ac.uk/articles/the-gothic-style-an-introduction [Accessed 23 Jan. 2026].
http://www.medart.pitt.edu. (n.d.). Plan of Cantebury Cathedral. [online] Available at: https://www.medart.pitt.edu/image/england/Canterbury/Cathedral/Plans/Canter-Plan-Carve-s.jpg [Accessed 28 Jan. 2026].
http://www.saint-denis-basilique.fr. (n.d.). Stained glass windows, symbols of the divine – CMN. [online] Available at: https://www.saint-denis-basilique.fr/en/discover/stained-glass-windows-symbols-of-the-divine [Accessed 25 Jan. 2026].
Week 2
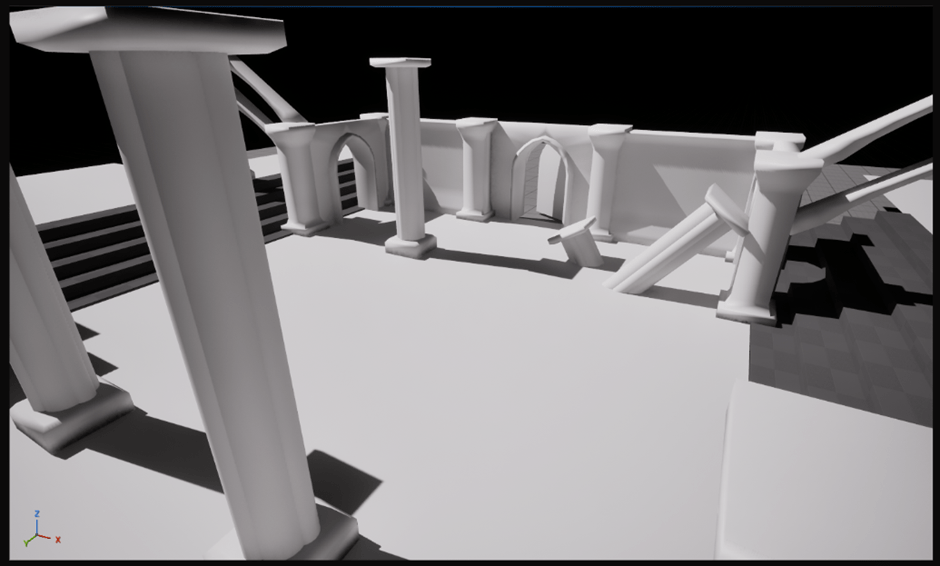
In this week, I started to produce rough models for the dungeon block out.
Setting the grid size in Maya and Unreal is a crucial process to ensure that modular assets connect and snap to the grid together. This process took some care to get to the right settings and get used to the workflow. The scale man was useful to check and compare the scale so that modular pieces felt right for the scene.
I found some references which were useful to understand how game developers and artists in industry use grey boxing to develop their scenes. The key points I found from this was that they use simple models to plot out the scene quickly, to see how the character would be drawn through the level and to understand what assets are needed and their importance to the environment. I found within my research, one of the videos states that grey boxing is a critical skill for employability. It helps to give a common understanding of the level for developers and artists.
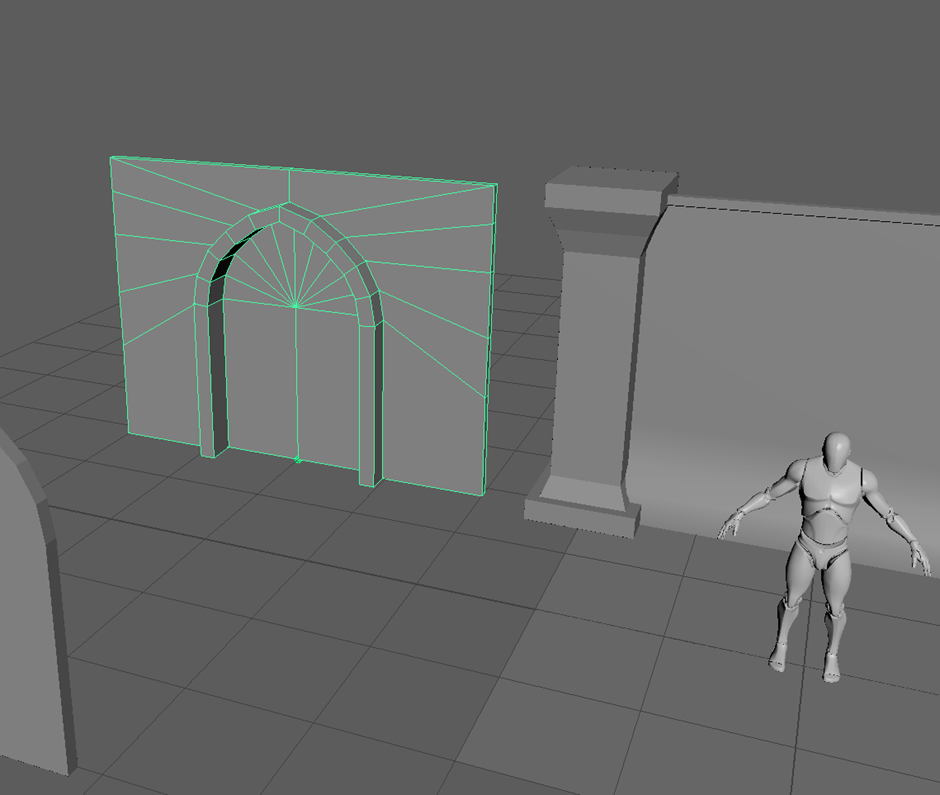
I started the modular construction in Maya using primitives and used the mesh tools to give the pieces a baseline shape and size to build up a basic kit of modular assets which included: wall, pillar, flying buttress, something like a balustrade and an archway.
I created the wall from a plane so that I could shape the base and extrude out a basic wall cap. After I finished adjusting the front look of the model, mirroring allowed me to complete the 3D structure of the shape. The lectures helped me to use a quick method to construct the archway which was new to me.
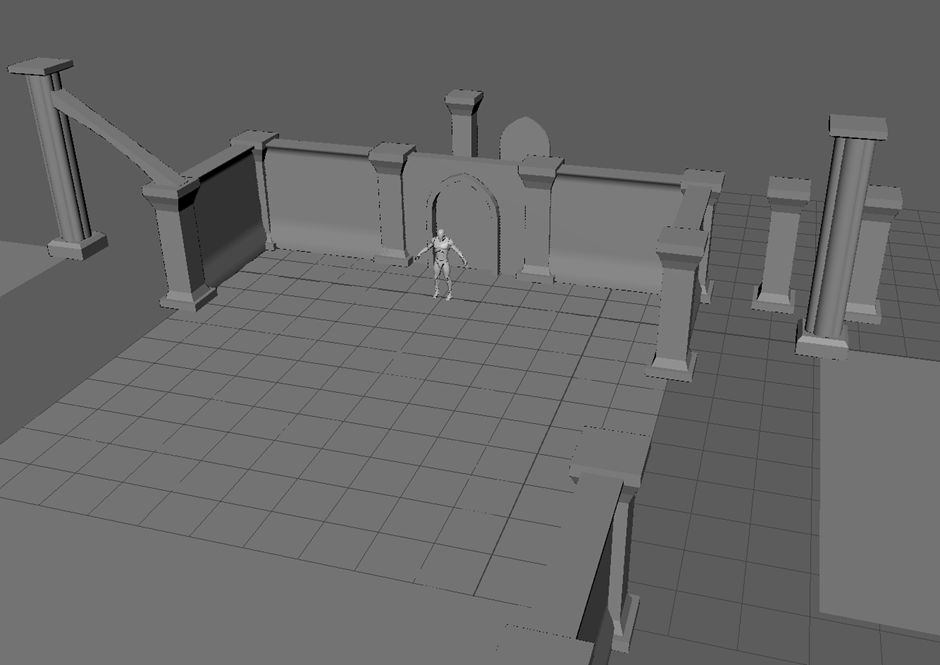
To set up the Unreal project, I used a top down template and added this to a repository that I created for this in Git Hub from a Falmouth template. This reinforced my knowledge from previous projects, especially using fork to clone the project to my machine and collect and commit the changes using pull and push. As I have been working on different machines in this course, I have had to be strict with myself to pull changes at the start of every session and push at the end to make sure that all of my work done previously was available.
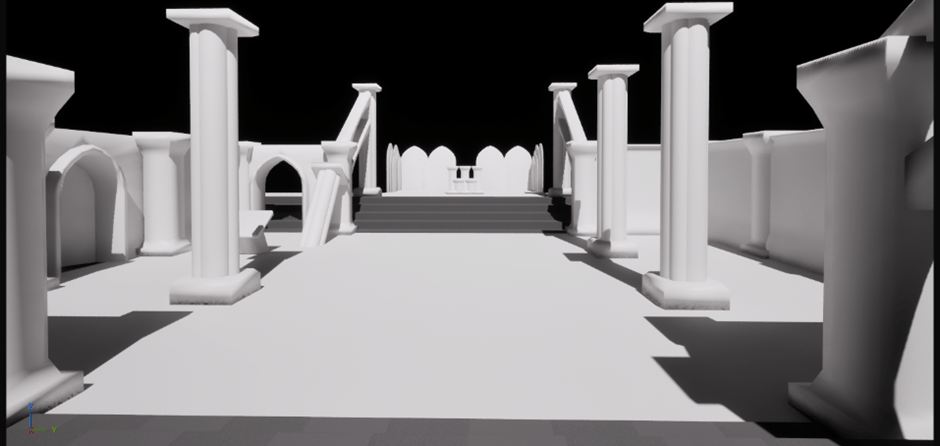
I transferred the block-out to Unreal Engine to play test the scene and try out different layouts of my modular assets. I found that I needed to adjust pivot points for some objects in Maya to snap correctly to the 4 x 4 grid.
My design idea was to use height to direct the player through the level and to start to establish the atmosphere I am looking for. To bring out the shadows and shapes, I set the lighting by switching off the sky box and used the directional light focussed on the centre of my scene. I am pleased with how the layout gives a grim dark feel for the dungeon.
Bibliograpy
ArtOfSoulburn. “What Is Greyboxing in Videogames?” YouTube, 27 Sept. 2022, http://www.youtube.com/watch?v=fjakOuNer78. Accessed 28 Jan. 2026.
https://www.facebook.com/igor.gema. “Level Design Grey Box Services.” KREONIT, 13 Dec. 2023, kreonit.com/services/level-design-grey-box/.
Polygon Academy. “3 IMPORTANT Tips for Greybox Level Design – ArtStation Challenge | VLOG EP.002.” YouTube, 23 Oct. 2018, http://www.youtube.com/watch?v=4wziE0AYCoo. Accessed 28 Jan. 2026.
http://www.medart.pitt.edu. (n.d.). Plan of Cantebury Cathedral. [online] Available at: https://www.medart.pitt.edu/image/england/Canterbury/Cathedral/Plans/Canter-Plan-Carve-s.jpg [Accessed 28 Jan. 2026].
Week 3
Tileable materials are necessary to create a detailed seamless texture for large areas of the environment and crucially, to maintain a consistent look and resolution using smaller images. I now understand that developing tileable materials is a critical part of the workflow for game environment artists.
This is the first time I have used Substance Designer and I found it was a very powerful tool which allowed e to make changes quickly to match my design ideas.
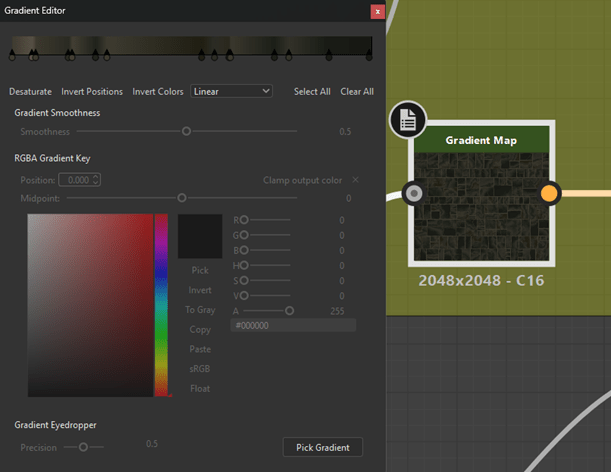
I have followed the mural examples to create my own node graph for the tileable floor material. I understood the node technique from previously using blueprinting in Unreal as this correlates with the node graphs in Substance Designer. I adjusted the base colour of the floor material by using the gradient picker to set a gradient map from a Warhammer floor image in my PureRef.
Previously I used photos of walls to try to generate texture maps and materials in Blender but this tool avoids complicated baking and UV mapping; however, I can see that it will take some time to gain a full understanding of how to use the nodes and set them up without following a tutorial.

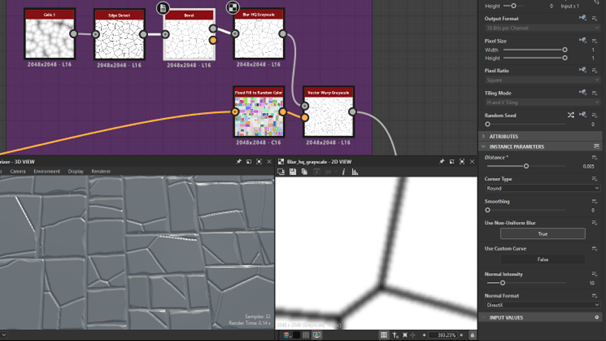
I also reduced the crack density within the bricks to make it more realistic and fit with the aesthetics of Warhammer.
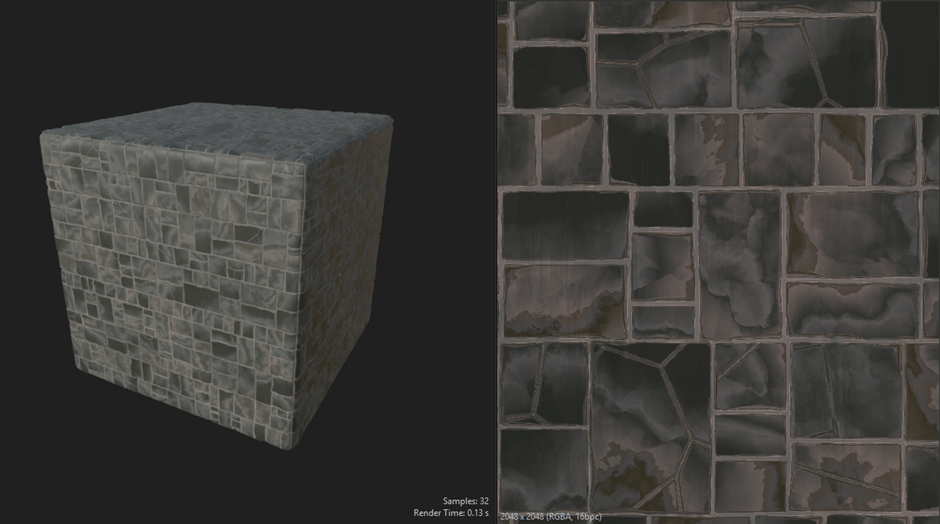
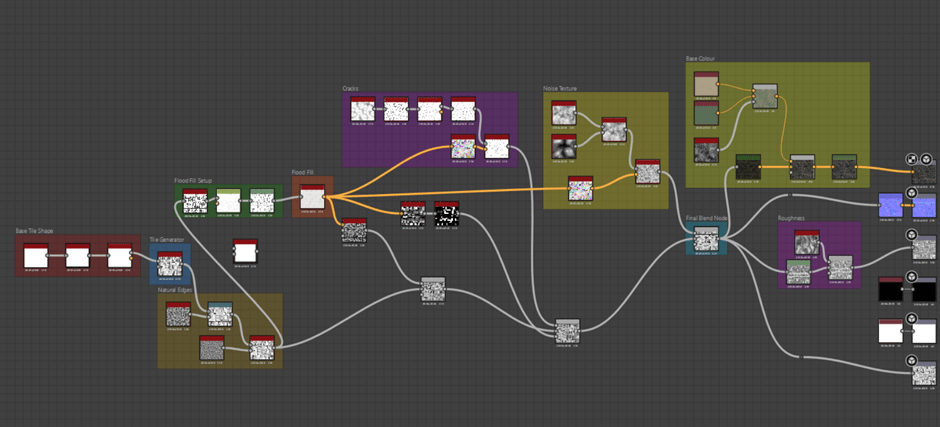
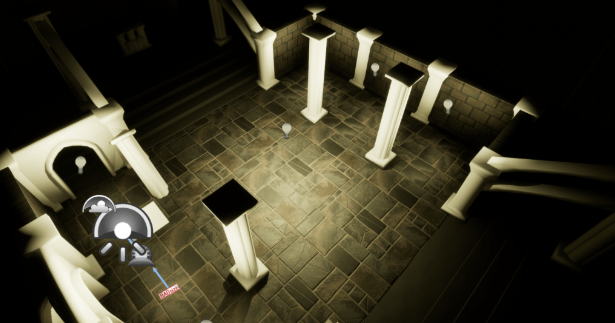
After testing it Unreal, I felt that the floor needed to be dirtier and darker as it doesn’t feel that it is in a war zone. I will add grunge and dirt and darken the colour gradient after I have set some more lighting in the scene.
I have learnt that Modular kits allow even small studios to create large levels because they are able to reuse the kit by arranging them in different ways as well as being able to change appearance and size. This also helps to keep games efficient by decreasing the number textures that need to be rendered.
Joel Burgess who worked at Bethesda on titles such as Fallout, and Oblivion talks about how modular kits can be bland; however, skilled environment artists can break up appearance enough so that it doesn’t feel repetitive.
In the Warhammer 40k series, games such as Space Marines 2 an example of modularity is the reuse of large pillars, balustrades and gratings.
I created an initial list of modular parts that will allow me to create my dungeon design; however, I will prioritise the 7 required kit pieces.
| Plain wall |
| Curved plain wall |
| Broken wall |
| Cut out arch |
| Stained glass window |
| Cage lights with skull |
| Balustrade |
| Pipes and cables |
| Shrine |
| Candles |
| Tanks |
| Flying buttress |
| Pillar |
| Broken pillar |
| Alternative pillar |
| Corner piece |
| Doorway |
| Straight staircase 4m wide |
| Curved staircase |
For the top down game view, I considered how the assets would look within the game scene and I wanted the pillars to tower over the character and have the feel of the huge pillars seen in third person views in games like Space Marine 2 but translated into top down view format. I particularly wanted the top of pillar to visible and interesting in the camera view and to also see the pillar mouldings clear when seen from above.
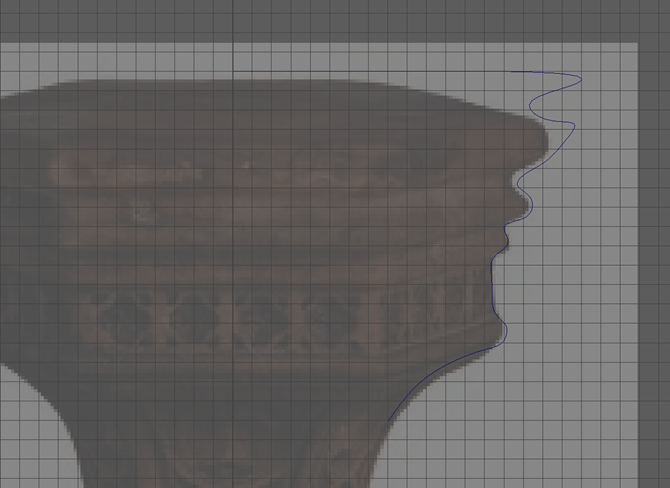
I used an EP curve to create an outline of the top pillar moulding using a reference of a gothic stand that had an interesting rounded top piece. A video tutorial explained that EP curves are better than CV curves as the points traced by the curve sit on the line of the curve.
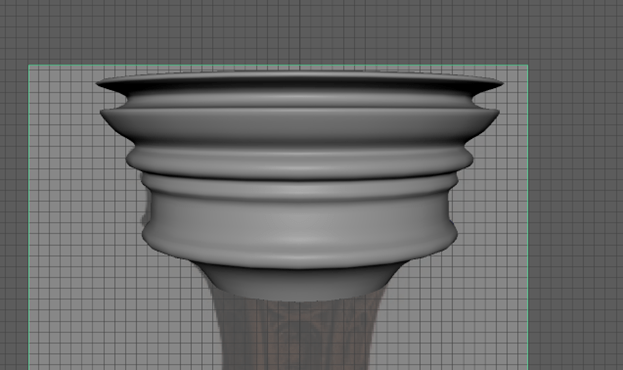
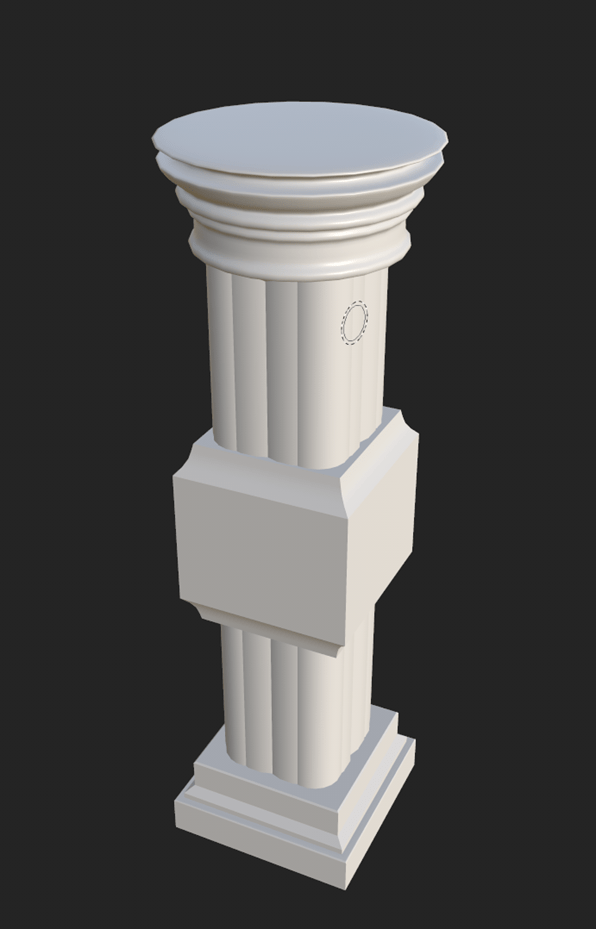
My pillar design includes a central block that I have designed to have a skull and wreath on.
Bibliograpy
Burgess, Joel. “Building Huge Open Worlds: Modularity, Kits & Art Fatigue.” 80.Lv, 7 Aug. 2018, 80.lv/articles/building-huge-open-worlds-modularity-kits-art-fatigue. Accessed 7 Feb. 2026.
Kellman, Nathan. “Modular Level Design: Definition.” Game Design Skills, 28 Mar. 2026, gamedesignskills.com/game-design/modular-level-design/. Accessed 7 Feb. 2026.
Week 4
In this week, I explored different tools to create tileable materials for my project as I previously discussed the importance of understanding how to work with a large range of tools so that I can adapt to different companies processes.
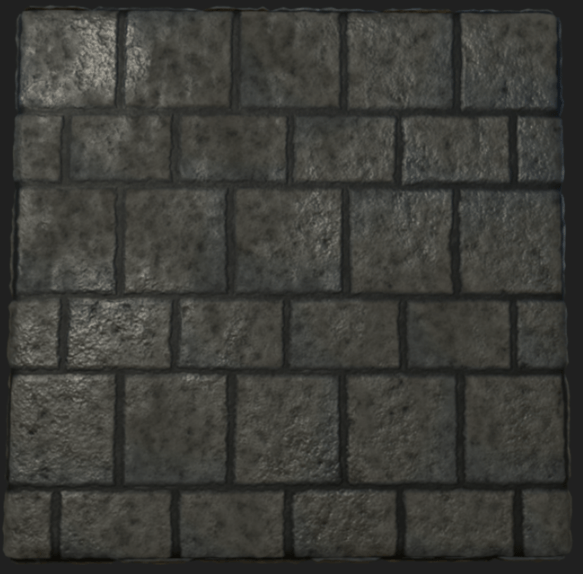
I used a Mural tutorial for a brick material from the Falmouth Learning Space and adapted the parameters to produce a grim-dark seamless material for the wall. I felt confident in changing a larger number of parameters to achieve the texture as I have started to understand more about what the nodes do.
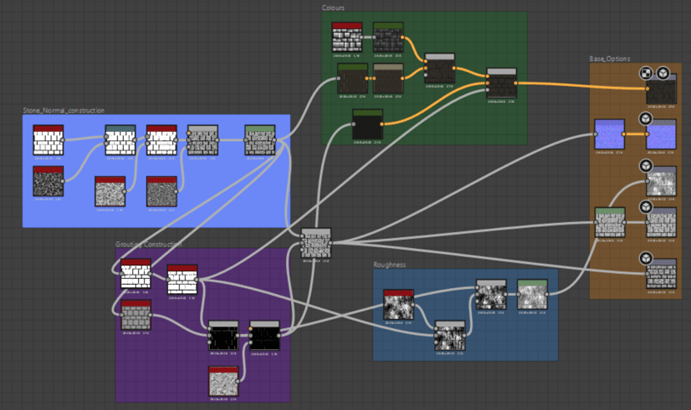
I wanted to make the texture to look like a dank dungeon wall. Adjusting the histogram levels blended with the grunge in the node graph added a wet looking reflection. I darkened wall to follow dark dungeon design.
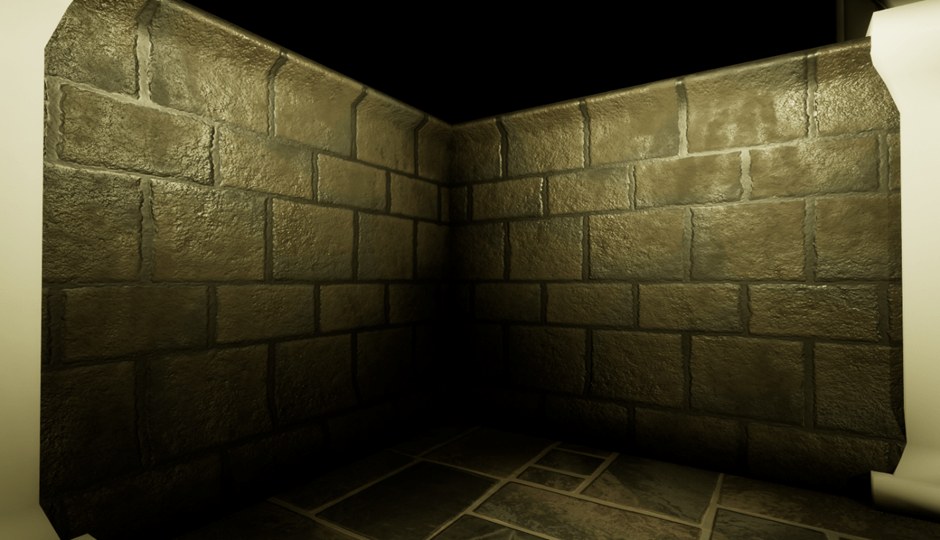
When I transferred this to my project in Unreal Engine the rendering was exactly the way I wanted it and I can see that my choices for the floor and wall colour palette are working well together.
I also tried Substance 3D Sampler with a stone wall image and while it was really rapid, it didn’t work well with the image that I used because it wasn’t regular and it didn’t wrap well. I will try this again in a later project.
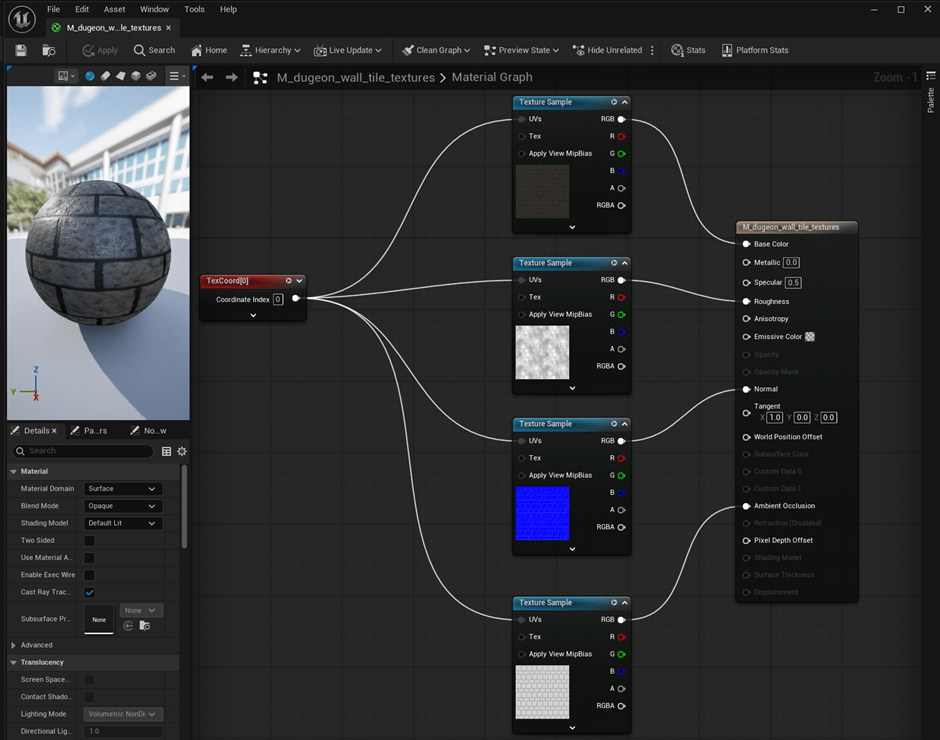
When importing the texture maps to Unreal Engine, I created a material blueprint using a TexCoord node to align and tile the UV texture in the modular components.
I also tried out creating a seamless stone wall texture in Zbrush; however, I hit a series of problems which at the moment would need more time to follow further tutorials to understand what went wrong.
Week 5
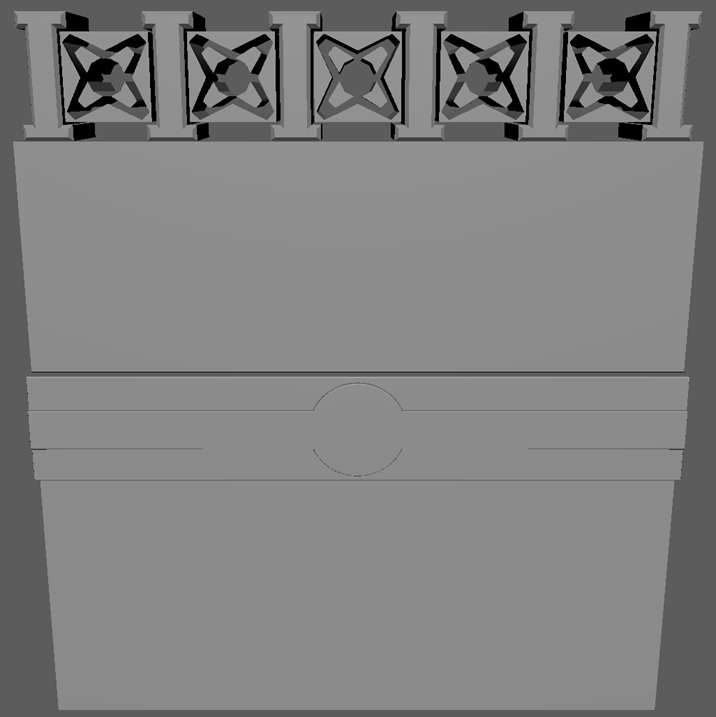
This week I have building and texturing some of the main elements of the modular kit. I have been thinking about the shape and design for the wall elements and how I can add some iconography to the face of the wall as well as how to add interest to the top of the wall. Although I have planned to include most of the detail in the trim sheet I actually ended up modelling the top wall cover. This is the first top down environment I have designed and when doing this I have realised how important it is to consider the look and detail of the parts of the assets that are visible to the player within the design process.
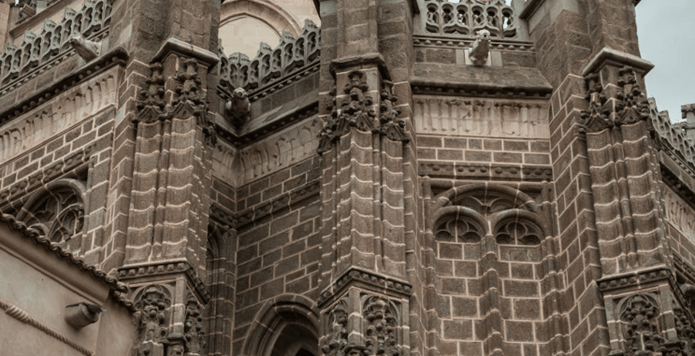
I started by looking at a reference I had found which had interesting railings at the top of a wall. I particularly liked shape and the way that light interacts with it. I felt that this gave me a strong steer for the type of design that I wanted to achieve but also to think about how to include iconography.
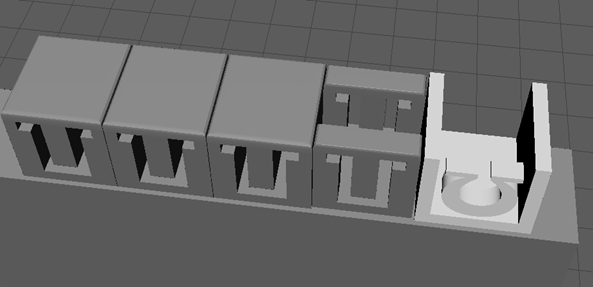
I modelled in Maya some different variations of the top piece to see what it looked like from top down and how the shadows could form.
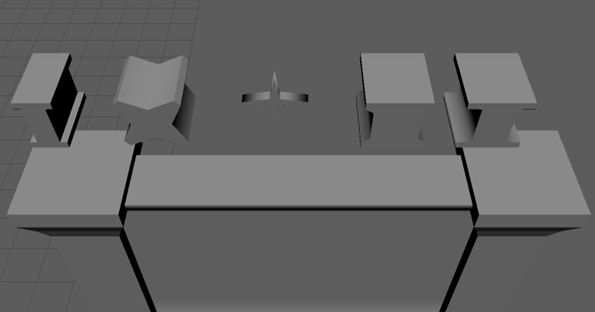
I decided to use the ‘I’ shape because it has the inquisitor’s iconography as well as looking believable for wall top. I plan to sculpt a skull that will fit on the middle element. I was really pleased with how this designed turned out and I have started to think about how to light it so that I can make the most of the shadows.
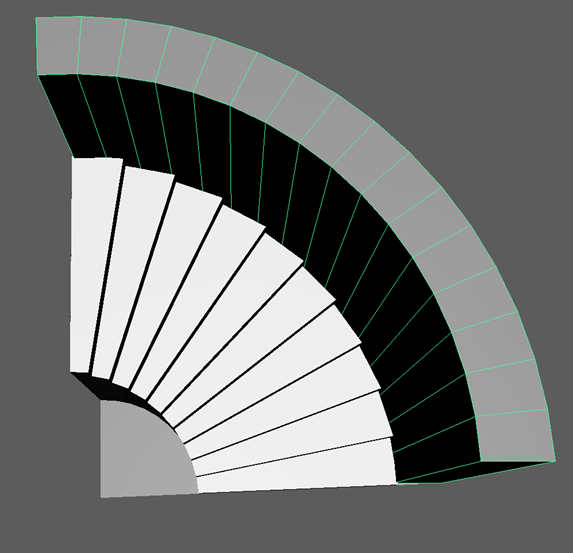
I have also modelled the curved wall element which I plan to be able to use against the curved stairs. This was quite tricky to get right because of how the bend deformer was reliant on the position of the pivot point so I spent some time trying to work out the length that the wall needed to be, so that when I bent it, it perfectly matched the stairs.
In this week I planned a trim sheet so that I will be able to add interest and detail to the assets. In the lectures I learnt about the drawbacks of tileable materials which is that it is really hard to get some interest in and variation without creating an obvious repeated pattern. In industry trim sheets allow for an artist to give materials difference and have no impact on polygon count which is also important because that effects the games performance. Learning how to create and use trim sheets is a key skill for environment artists.
In my research I found a video which showed an example of a large cathedral area that was textured using just one trim sheet, which showed the power of using them in environment design.
I started planning what I was going to use to add detail and breakup the tileable textures as well as where I wanted detailed mouldings but couldn’t add more geometry.
I actually found planning this first trim sheet quite challenging because of two reasons. The first is that I had many ideas of what I could include but was unsure which to prioritise because I didn’t know if I would be able to complete another sheet in the time available. The second thing I struggled with was the sizing of the bands on the planning sheet so I actually went back into Maya to do a quick model to decide the size of these.
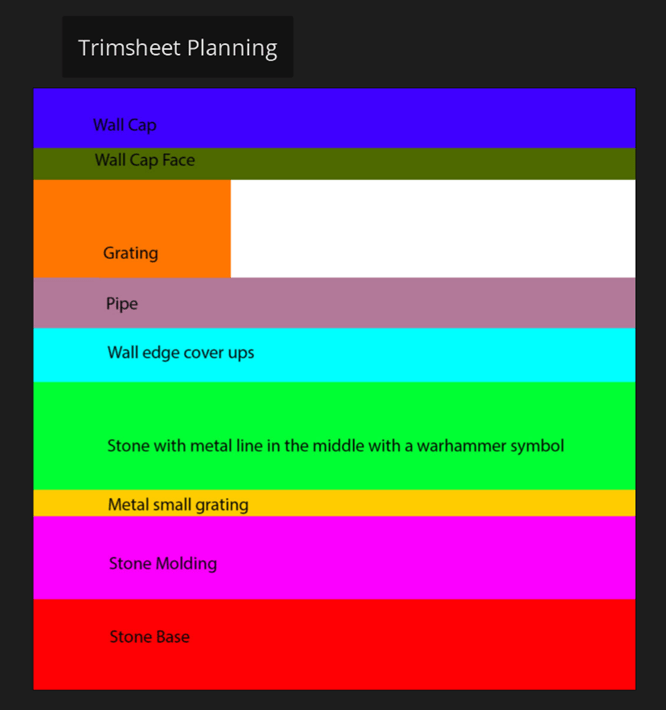
This is the finished trim sheet plan which I have mostly filled with bands for the wall, but I will add some smaller decorations like bolts in the white band.
Bibliography
Abe Leal (2025). Trim Sheets for Games – Modelling and Organization. [online] Abe Leal 3D. Available at: https://www.youtube.com/watch?v=CsKGqD8GVNY [Accessed 22 Feb. 2026].
Wills, J. (2021). Substance Painter Tutorial: Demystifying Trim Sheets. [online] Escape Studios. Available at: https://www.youtube.com/watch?v=qEuGyIkvKx4 [Accessed 22 Feb. 2026].
yitsadmin (2024). St. Vitus Cathedral Prague Czechia | Catholic Shrine Basilica. [online] Catholic Shrine Basilica. Available at: https://catholicshrinebasilica.com/st-vitus-cathedral-prague-czechia/ [Accessed 29 Jan. 2026].
Garlick, M. (2015). Ludlow: St. Laurence’s Church: The tomb of Sir Robert Townsend in the chancel. [online] @geograph_bi. Available at: https://www.geograph.org.uk/photo/4635133 [Accessed 27 Mar. 2026].
Week 6
After planning the trim sheet last week, I started to model the rows in Maya. I decided to change the plan a little as I had decided to actually create the geometry on top of the wall segments. I felt that this would give a better profile from the top down perspective. With the spare rows I have added bolts and trim for the pillars.
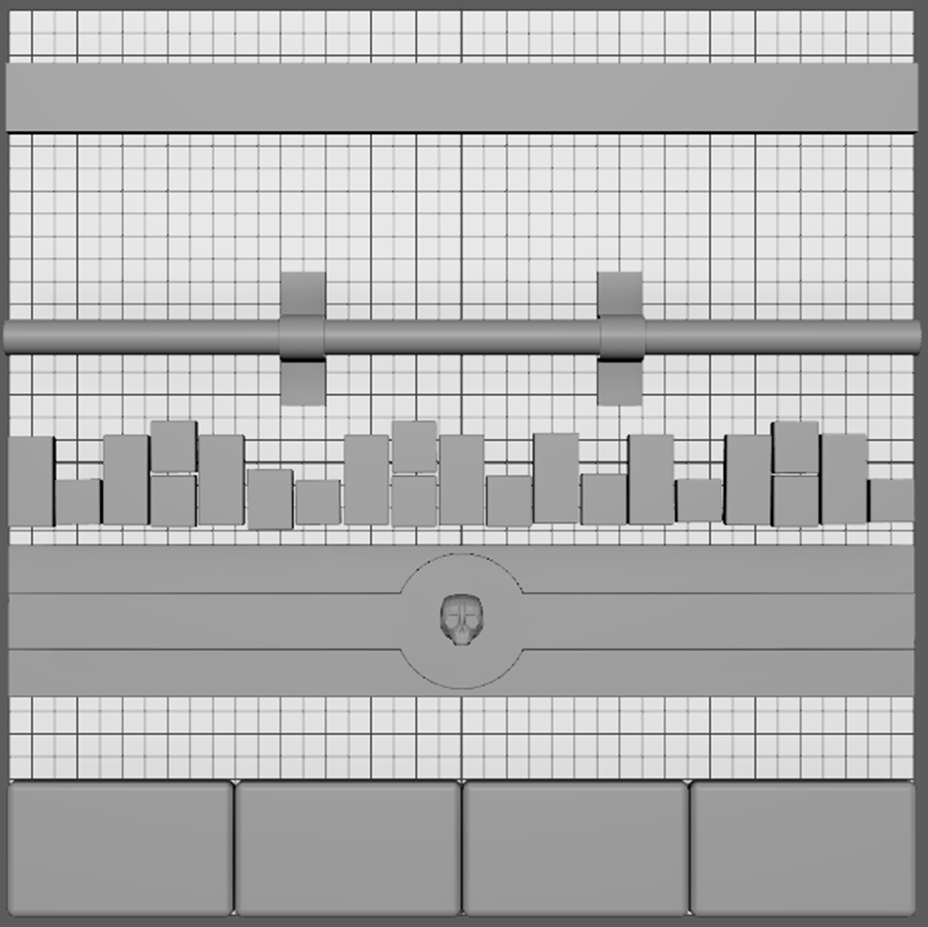
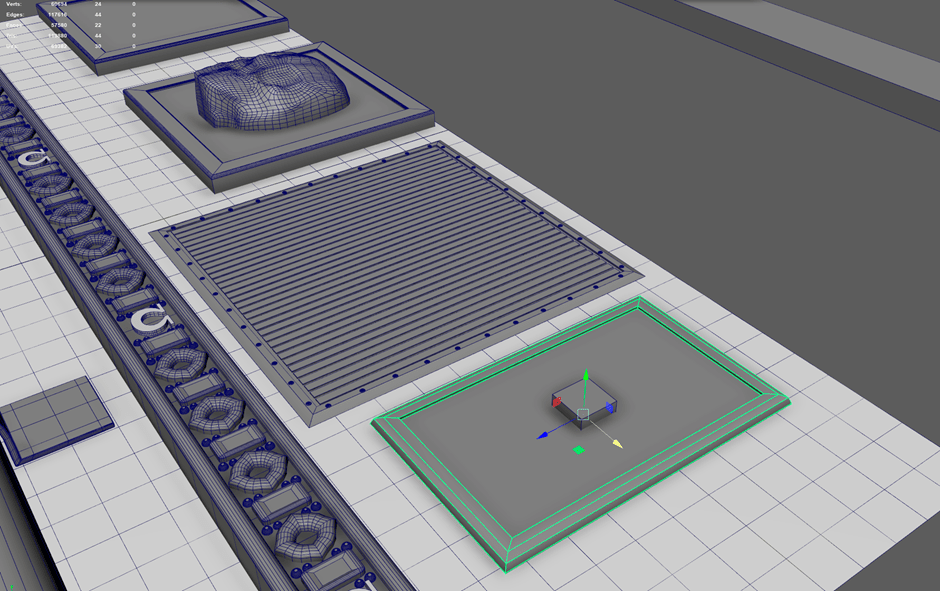
In Maya , I created some simple shapes and moulding for the stones, panels and grating and these I plan to sculpt in Z brush to create some trim to add interest and cover intersections between walls.
I had previously sculpted a simple skull in Zbrush so that I could add it to both the trim sheet and in places around the environment. I felt that Skulls are critical iconography for Warhammer and I wanted to use them in various ways.
I really wanted to have a panel with a laurel wreath to signify the Emperor and decided to research how to translate a 2D image into a 3D texture. For speed I used copilot to generate an image using a query: “make a 2 colour image of a laurel wreath” and “stop them from crossing over at the bottom so just end the stem and leave a small gap”

I found a useful reference which showed me how to convert a a 2D image to geometry. This worked well and the only challenge was dealing with damaged geometry when I was trying to bevel the outside of the leaf to clean the edges.
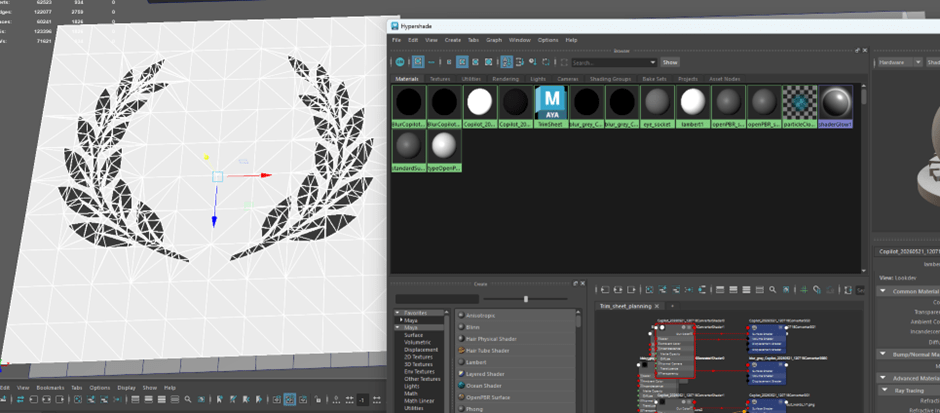
It needed cleaning up afterwards, using the hypershader and also unparented it from the original plane.
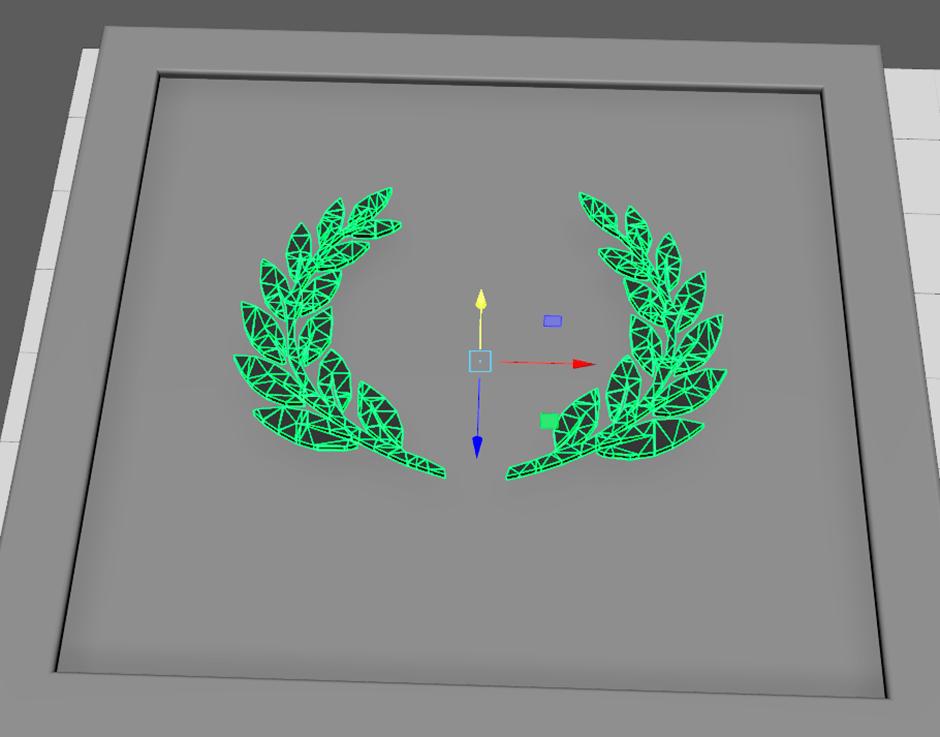
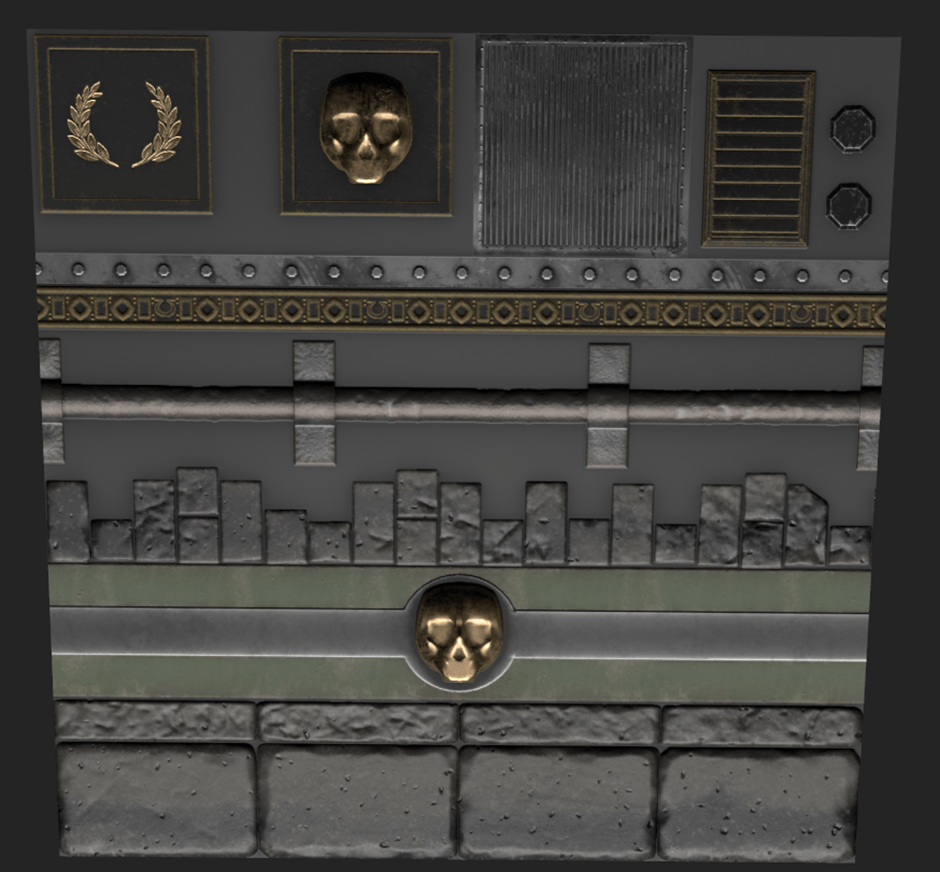
This is my finished Maya sculpt and I was really pleased with the way it turned out. I feel that I will be able to use all of these rows in many different places. This workflow is critical to environment creation in industry. Although it took a long time to get through the workflow, I feel that I have now learnt the process and so I am confident that I will be able to do this much faster as I progress through my projects.
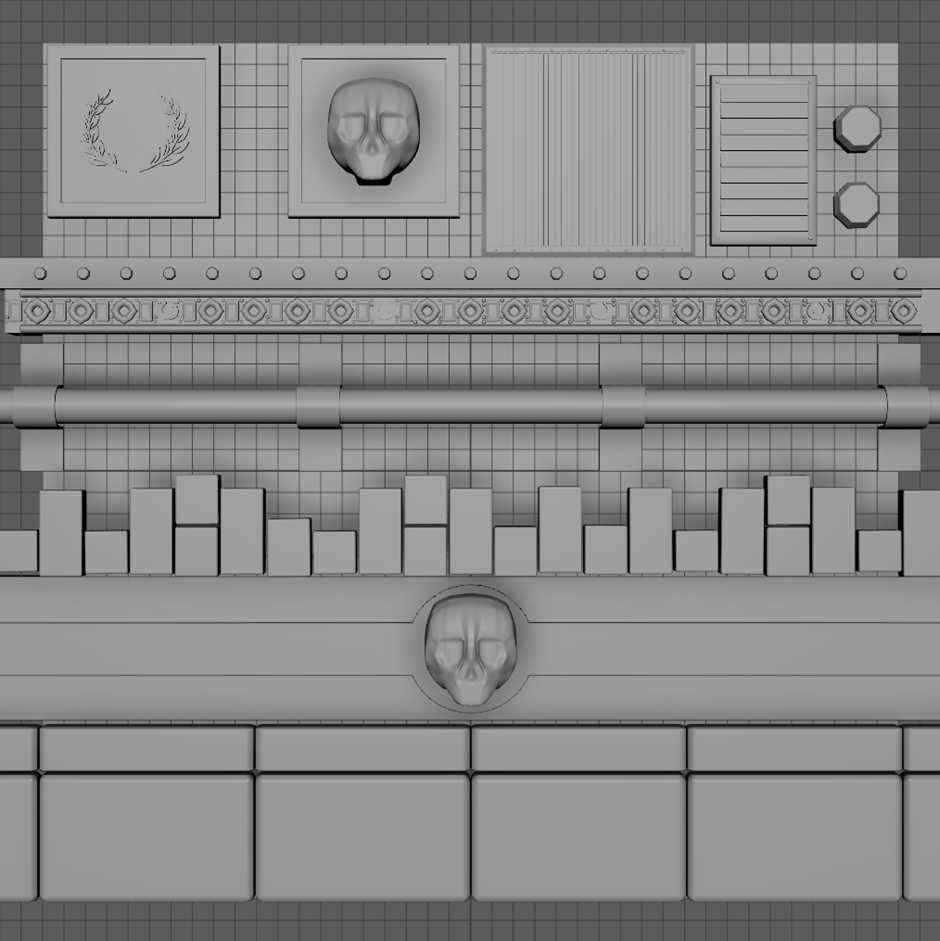
When I took the modelled plane into ZBrush, I found that some of the faces were missing due to bevelling and so I had to return to Maya to clean up some of the backs where the faces had ngons.
I Learned a lot with working through the different tools to group and split the meshes and using visibility to work on one stone at a time.
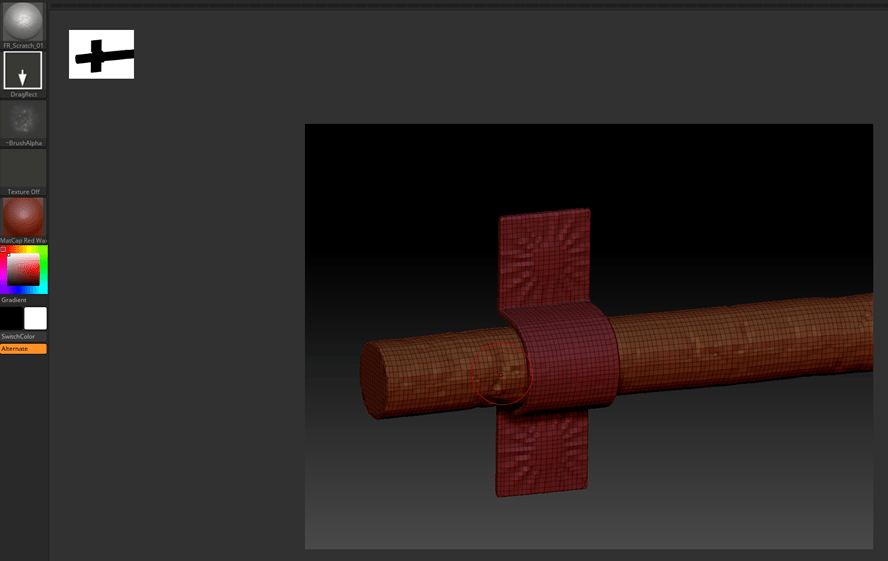
I was really please with the grungy scratched effect I managed to get on the pipe. I made a deliberate decision to keep these blocks together when I was sculpting because I was trying to make them look like they had been devastated by war.
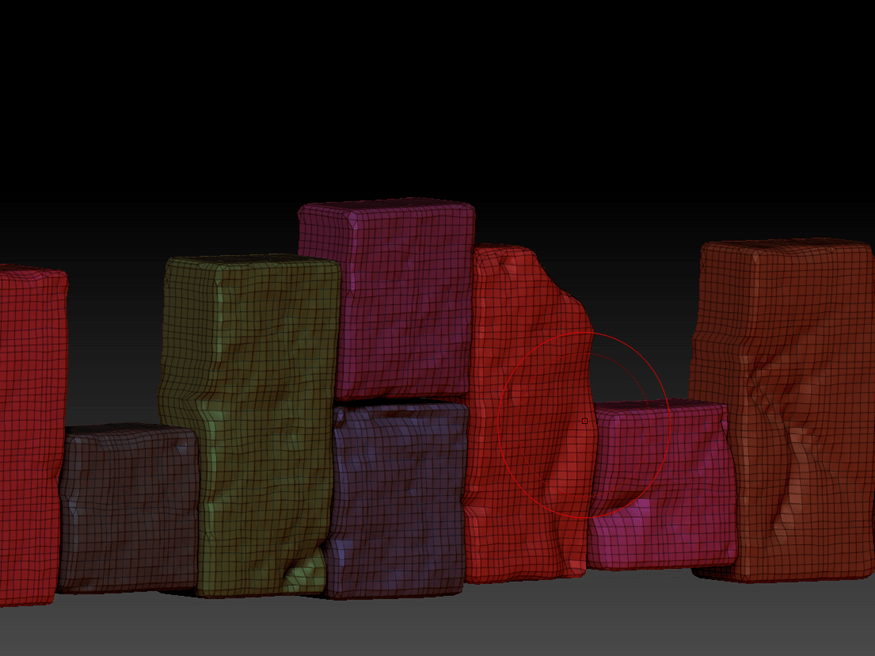
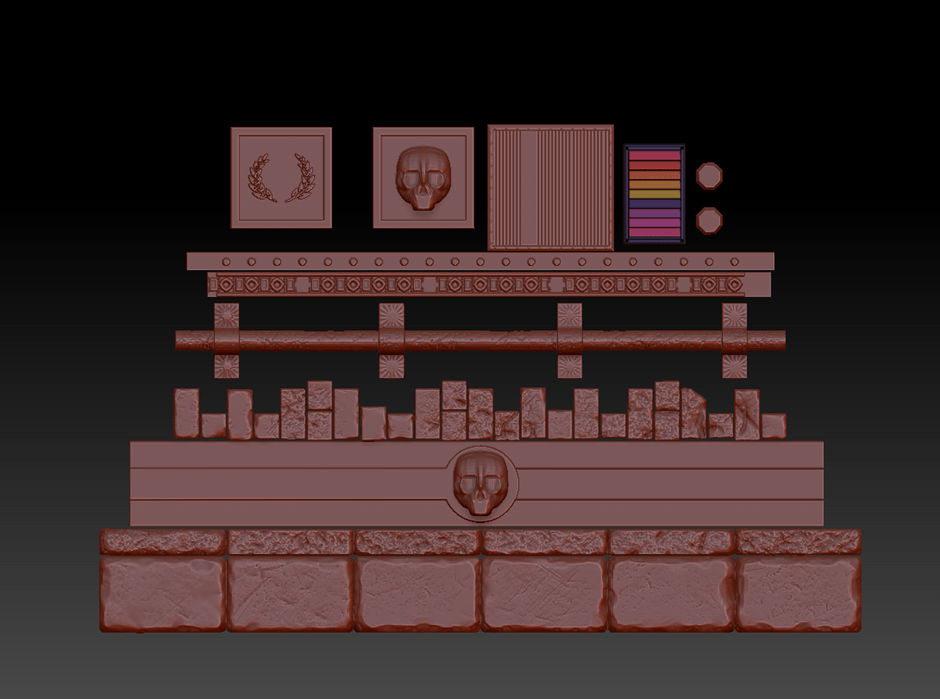
I think that I managed to use the tools to achieve wat I had designed for the environment and hopefully next time it will be quicker as I know some of the problems and how to prevent them from happening.
I couldn’t work out how to assign the color ID’s for each Subtool in ZBrush so I used a Lambert material in Maya, before taking it into Substance Painter for texturing.
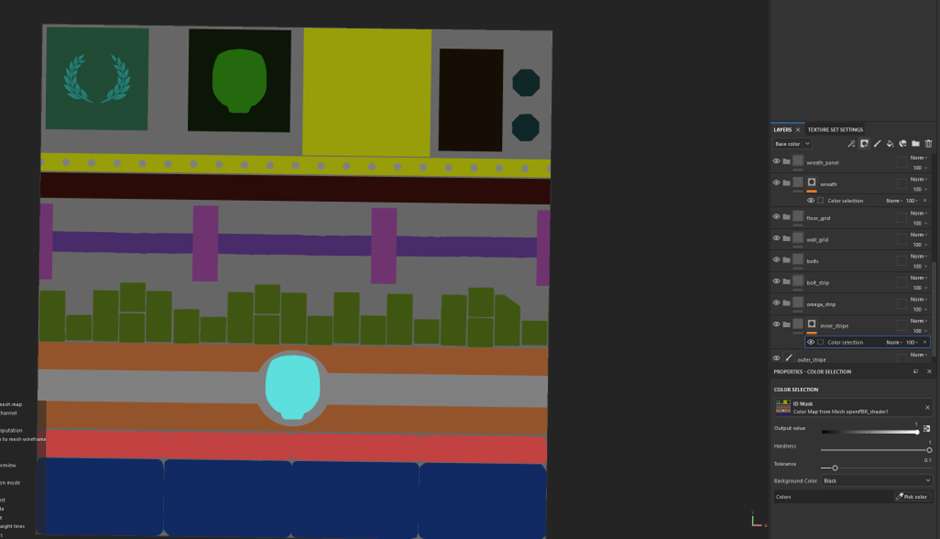
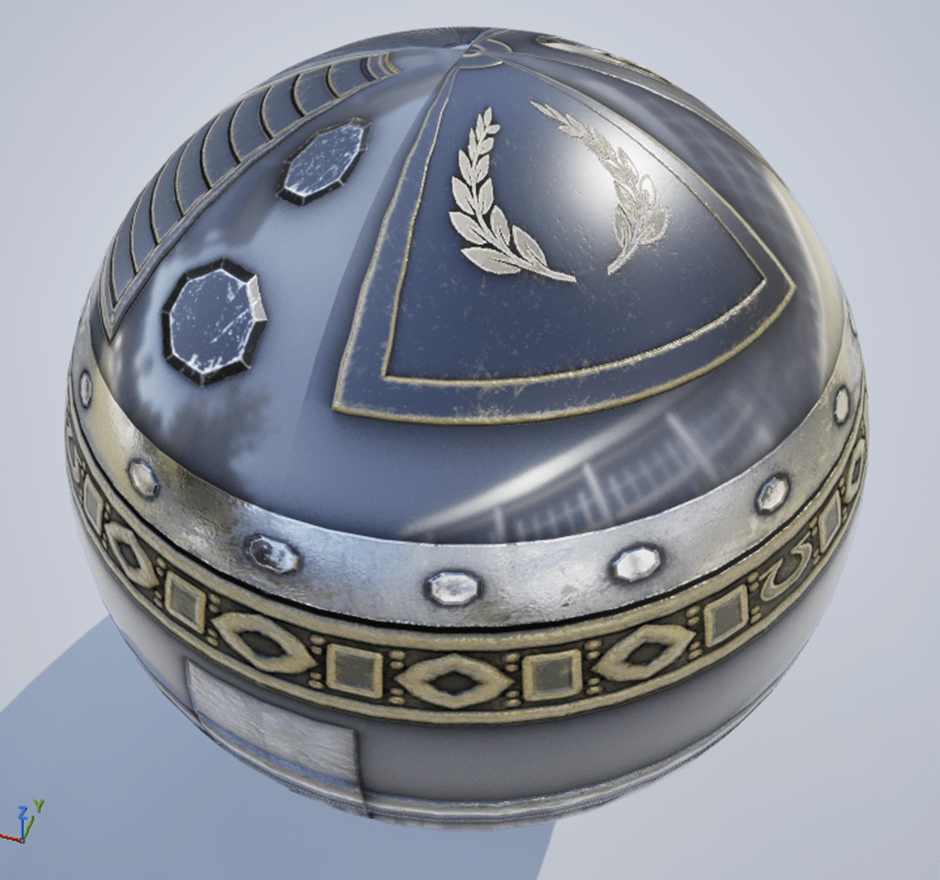
I was really pleased with the textured trim sheet and it had the right balance of grim that I was looking for. However, when I took it into Unreal, some areas of the trim sheet that looked great in Substance Painter, seemed too reflective in Unreal. I went back to Substance Painter to change the roughness on some of the layers and this improved but still didn’t get the textures to how I wanted them. I decided to stop changing the materials as I felt it was better to move on to other tasks.
Week 7
In this week I have been designing and modelling the doorway and creating smart materials in substance painter. I took inspiration from the Rogue Trader Game environment, which is also top down and has a strong mechanical aesthetic. I liked the use of tall spires, which work really well in top down and the tech grungy feel which I wanted to incorporate in the doorway and other parts of the environment.
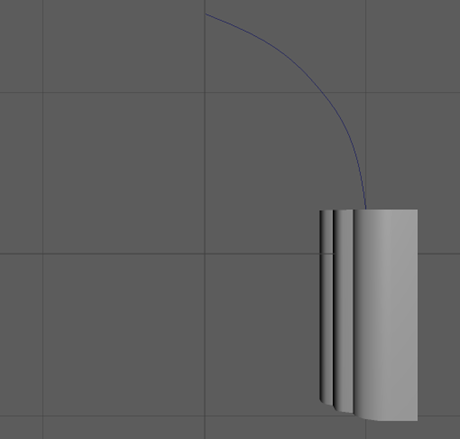
To create the gothic arch for the door, I adapted a technique that I had used previously used in Blender and transferred it to Maya. Starting with a cube, I bevelled one of the edges and added multiple segments that I moved to form the molding of the inner arch. To create the curve and point of the arch I used the CV tool. I found that the technique still worked in Maya but the profile took longer to achieve because the Bevel Custom Profile tool is not available.
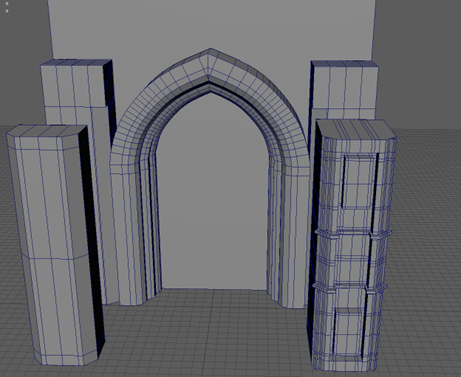
I modelled the door pillar to have a ‘mechanical’ aesthetic which I can bring out more by creating a metallic smart material that has edge ware on it.

I designed the upper parts to start to tell a visual story about the Space Marines first conquering a world for the Imperium and hinting at harnessing Necro technology. I will give it a neon green glow to further show the story.
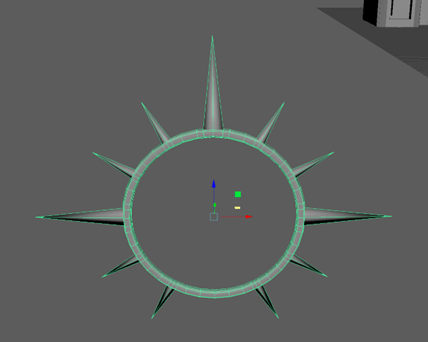
On the door, I wanted to make a strong sense of the Emperor’s power and how the inhabitants follow them. I created the ‘Emperor’s Light’ using a primitive torus shape, that I thinned and increased the size of. The main challenge which I came across for this, was that I needed to evenly add muti-cuts to the ring and pull out all the spikes by the same amount individually. I am pleased that I was able to create the symbol in a form that would be recognisable to players.
In Word I found a shortcut key to type an omega in the shape that reflected the Space Marines symbol. The Aptos bold font gave me closes look to the shape. In Maya the Polygon Type Tool translates text into a 3D object which I used for the door trim.

I have modelled a trim to go on the door, which also reinforces iconography. Because the doorway is one of the first parts of the environment that the player sees, I wanted to make a strong link to the lore and the story of the level. I am also going to transfer this to my trim sheet so that I can use it on other assets.

One of the industry standard workflows for texturing assets is to transfer an FBX model into Substance Painter after UV unwrapping. I applied a different Blinn material in Maya for each area that I wanted to texture differently. After importing the model, I selected a resolution of 2048 because that is the resolution limit for the project to keep the game Draw Call as low as possible. I created a Smart Material by adding a black mask and edge generator to a fill layer which was really effective on the side pillar mouldings and door, and the gold trim and Emperor’s light perfectly contrasts with the dark metal.
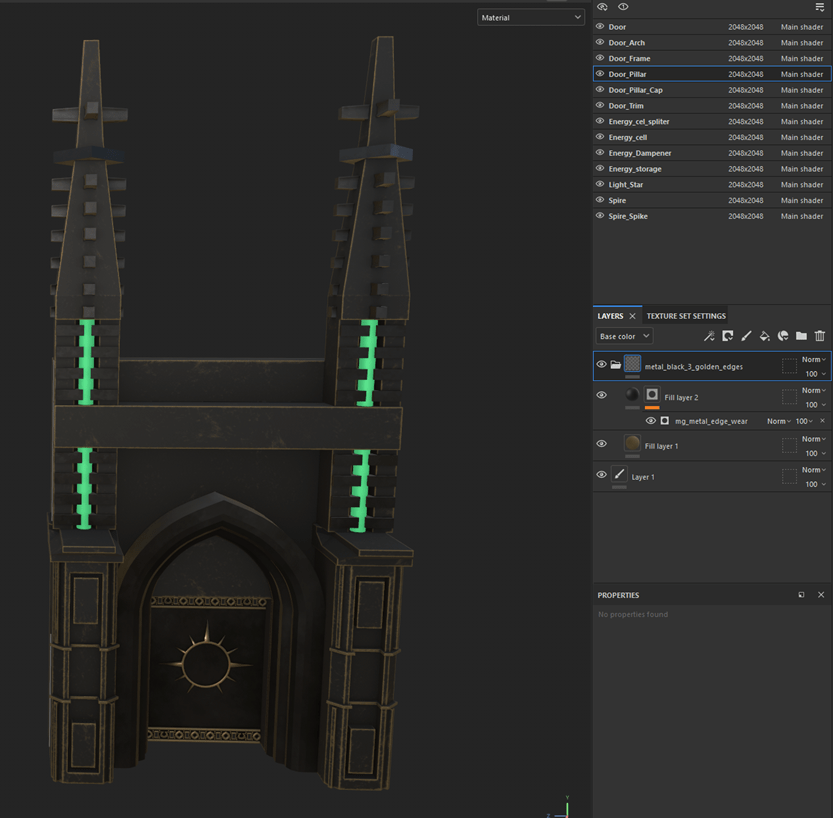
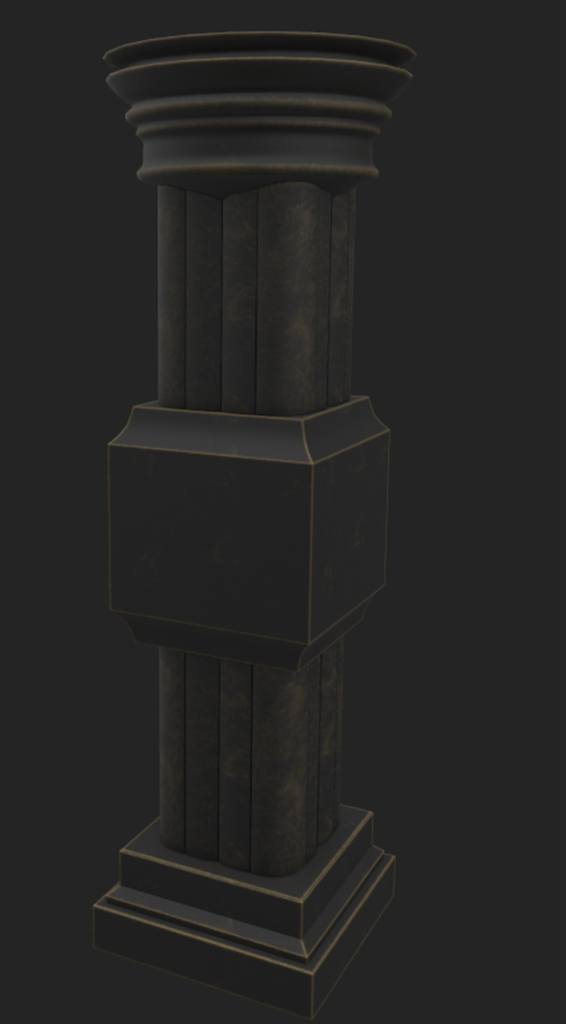
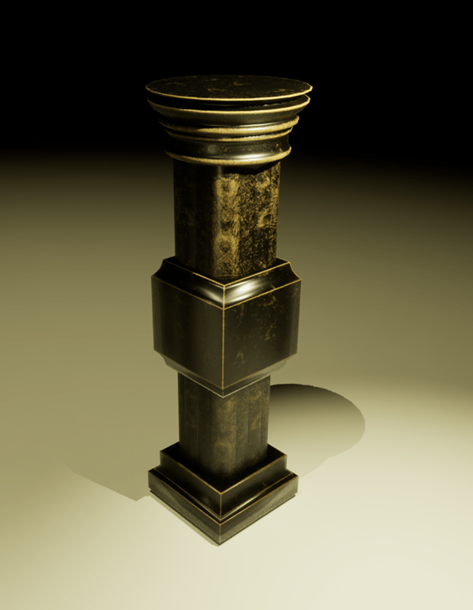
This material also works really well on the pillar, to emphasise the shape and give it a worn feel.
Week 8
At first, I found it quite difficult to narrow down my ideas and settle on a design that aligns with the visual story that I wanted for the environment. I found the video on storytelling in games very useful as it went through the different ways you could show the story within designing an environment. These differences ranged from putting notes on a page telling the player directly what the story is, which is a large tell, to the more subtle approach of showing blood on a pillow, or pages ripped out of a book, which leads the player to a clue that there was some importance of those missing pages. This I believe is a more crucial part of game development. I have always tried to include hints to the story in my game environments.
The shrine would be a perfect chance to explore this environmental storytelling. When designing the shrine, I had a clear idea that I should make sure it truly reflected the Warhammer Lore. As I knew that there are plenty of ways that shrines are used in games; for instance, healing and strength boost, I wanted to go down the idea that the shrine would contain an energy source that could be used for healing. I knew that this needed to be well visually represented. I plan to show the energy on the exterior of the shrine using glowing energy cells. In my design, I wanted the lower half of the shrine to reflect a tomb of warriors that died in combat on this planet. In earlier research I had found an image of an cathedral organ which I felt could inspire my shrine. To develop my idea further, I researched monuments to historically important people.
I also tried some photo bashing using references to get a clear idea of the structure I wanted for my shrine.
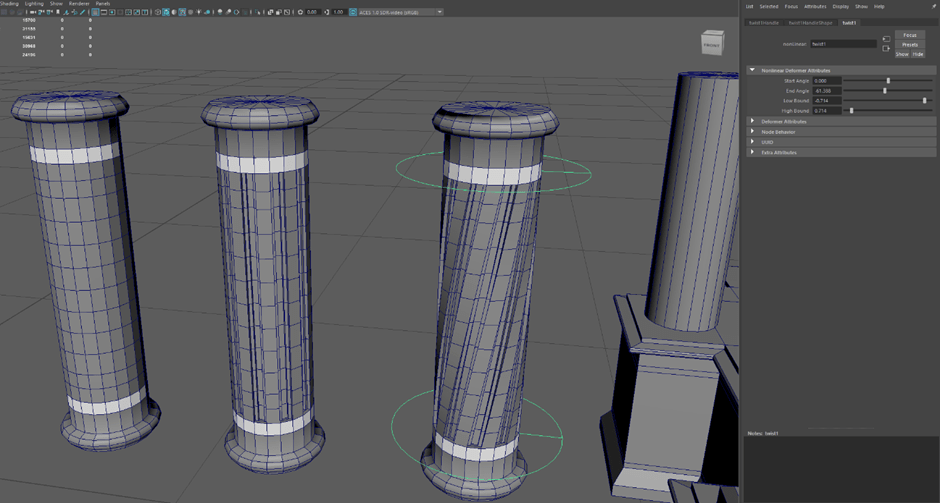
When first modelling the shrine, I used a lot of techniques that I had learned in lectures to form a more detailed sculpture. For creating the pillars I added inner detail with extrusions, however, I could see that they needed more to stand out from my other pillars.
Bibliography
Ian Bryce Jones (2018). Let’s Study Half-Life 2, pt 4: Environmental Storytelling. [online] YouTube. Available at: https://www.youtube.com/watch?v=yAj-rZq893U [Accessed 14 Mar. 2026].
Week 9
In this week, I wanted to start with creating a top piece for my shrine that implemented the design idea of it functioning as a powerful energy source that could heal the players from the damage of attacking Necron forces.
I drew out the towers with inspiration from the cathedral organ, because I wanted the shapes to reflect on how the sound is transmitted through the pipes and this idea linking to energy magnifying in the shape.
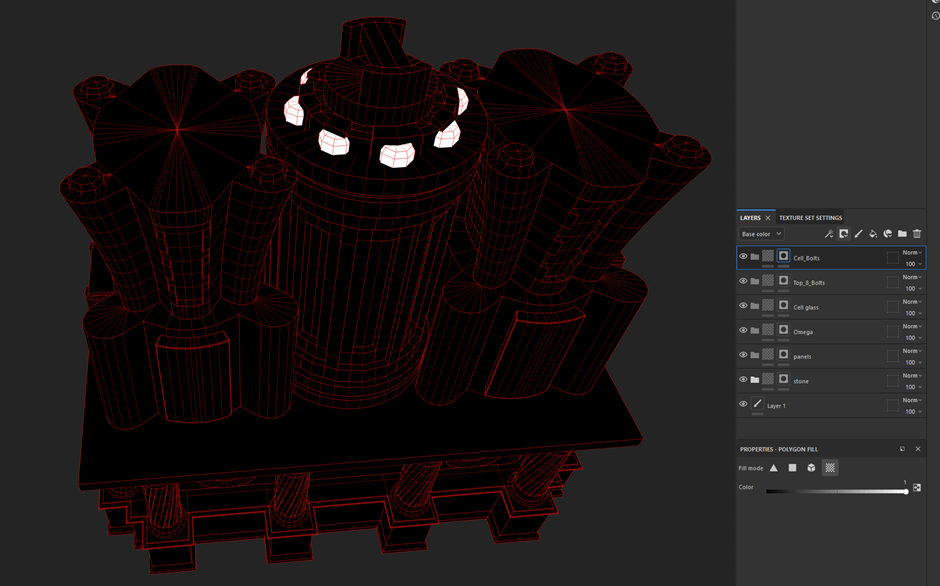
When I finished the model, I went through the unwrapping process which I knew would be longer than previous ones as this is the biggest and most complicated that I have done.
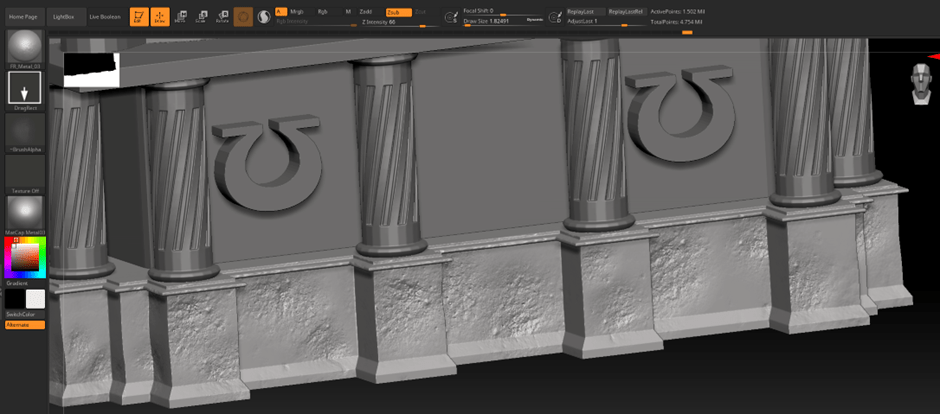
After unwrapping I exported to Zbrush to create a high-poly model with more details stone modelling to show the damage and wear from people leaning and kneeling on the shrine.
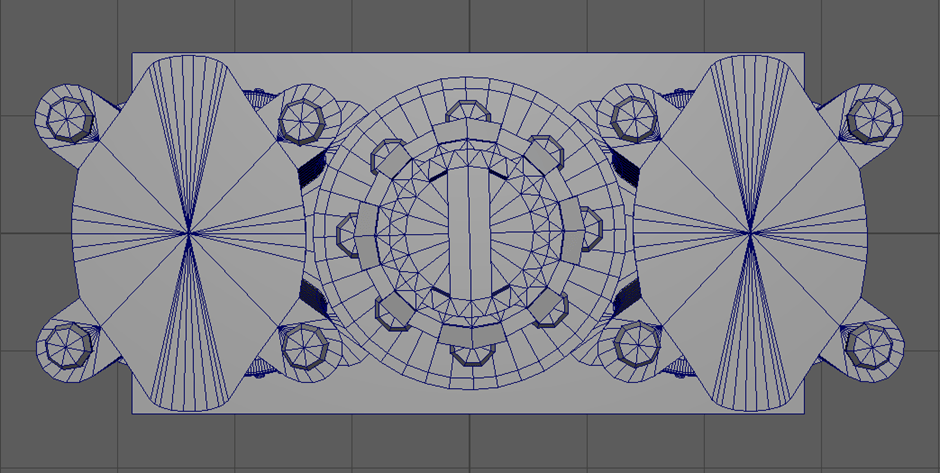
In Zbrush I found that some faces were missing and I immediately knew that there were problems with ngons that I needed to fix by connecting vertices. I spent more time in Maya checking each mesh and filling in the gaps before going back to Zbrush.
I went back to the resources like the lecture videos and Mural information to help with understanding how to use the tools and to produce clean models.
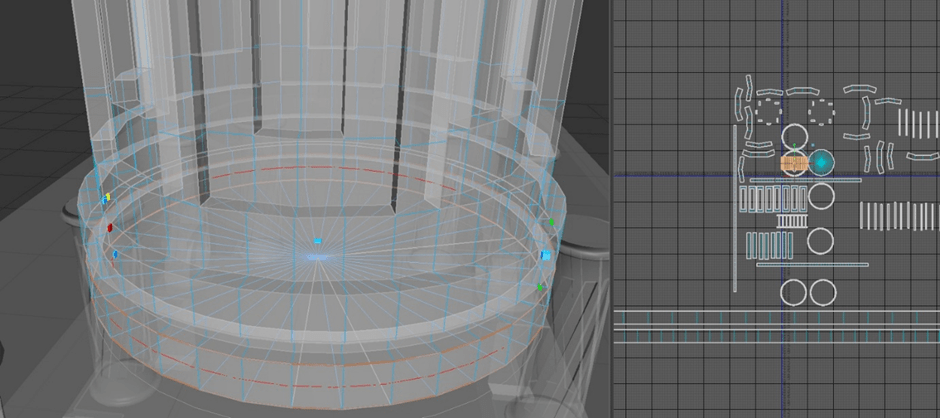
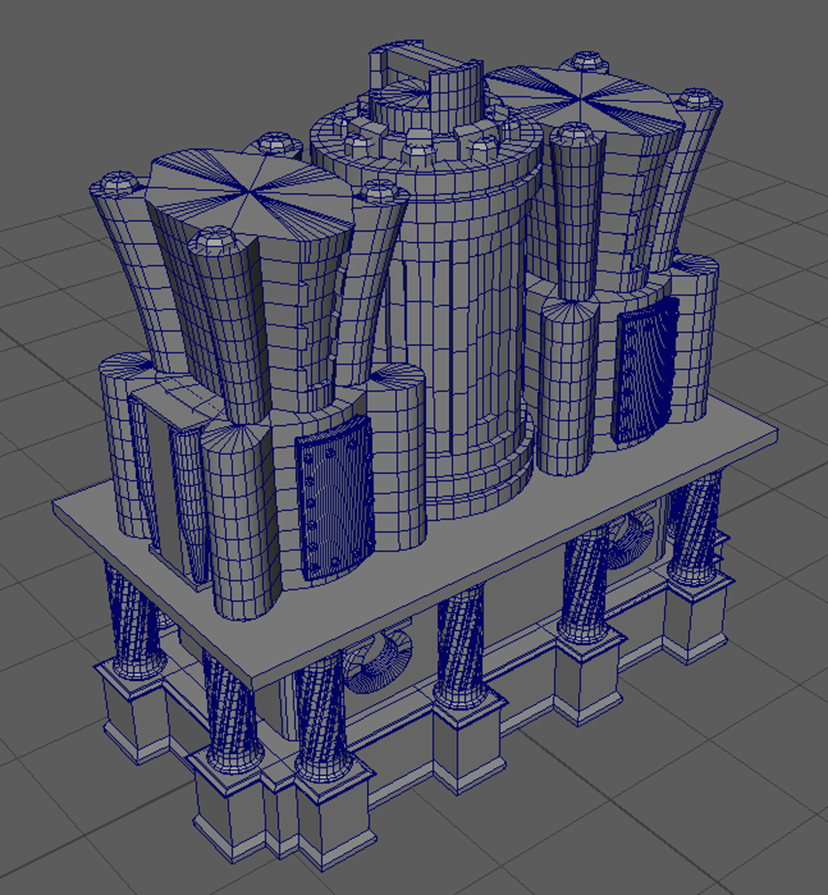
I carefully unwrapped each section of the model and laid it out to make sure that that the shells were all unwrapped correctly.
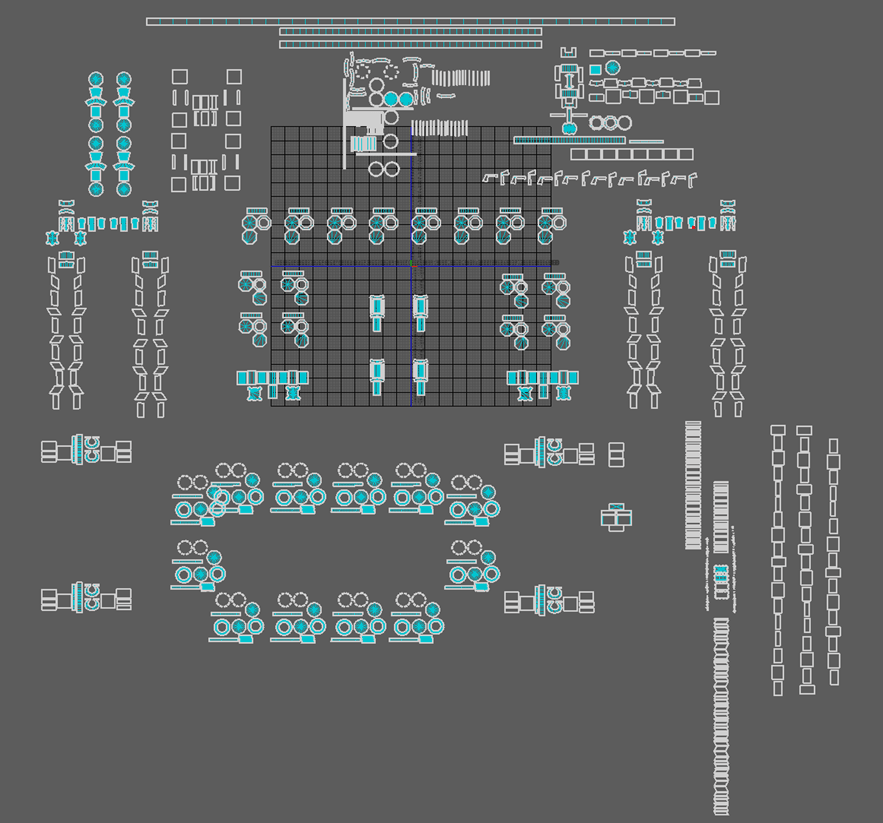
After making sure that the shells had the same scaling, I used the layout tools to pack the UVs into the 0 to 1 space to export the model again for the high-poly modelling in Zbrush.
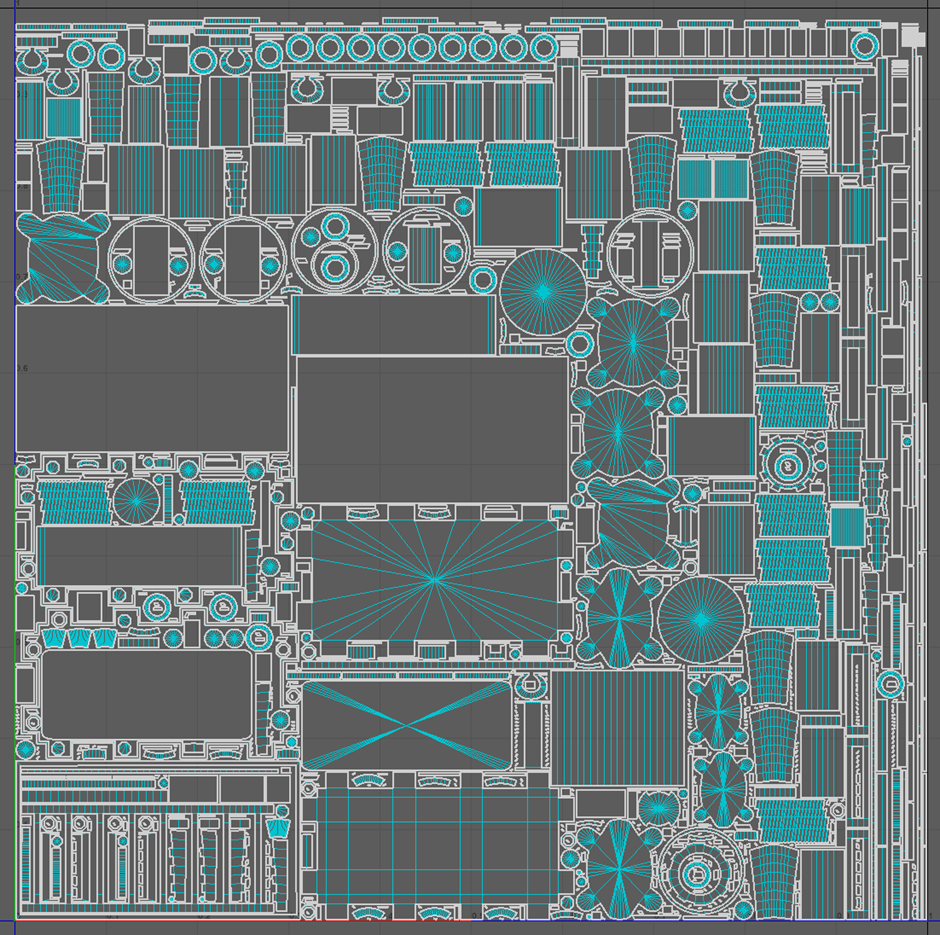
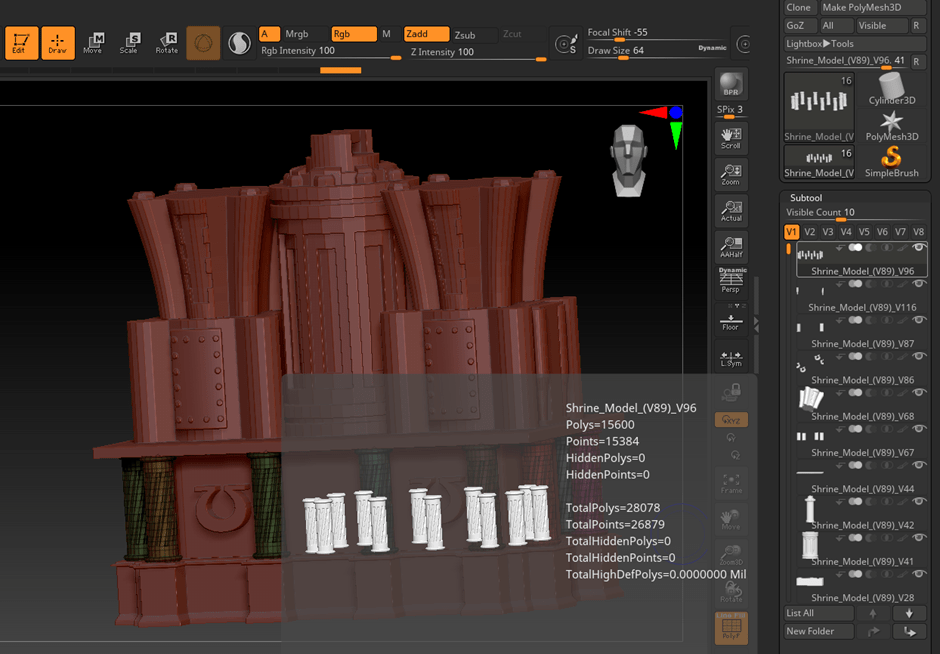
In ZBrush I assign polygroups to each object to allow for separate modelling. I used the normal set of brushes like trim dynamic and Hpolish to create a damaged stone front. To add dents and scratches to the panel I used a set of metallic brushes which were linked from one of the Murals. I exported the model to Substance Painter and baked the high poly details into the low poly.
I was really confused because some of the detailing was missing (that I could see in ZBrush) and so I thought that it was not baking properly and tried to research a solution but nothing worked. Eventually I add some big sculpting to see if anything came through and it did. I thought initially that that it was to do with how deep the sculpting was but after research I realised that it was because I had used a noise alpha and hadn’t add enough dynamesh resolution.
Bibliography
Academic Phoenix Plus (2021). Quickly Convert an Image into a 3D Model: Maya 2022. [online] YouTube. Available at: https://www.youtube.com/watch?v=j_LNqKb3zzY [Accessed 1 Mar. 2026].
Week 10
This week I learnt about the different types of light that I can use to present my dungeon environment. The Directional Light can be used to change the top surface lighting of all the objects in the scene, and this basically acts as the sun or moon in a scene. The Point Light, lights up only the parts of the scene that is in its own collision sphere; however, the size of the sphere can be modified to cover less or more space. The Spot Light works similarly to the Point light however instead of the lighting up areas only in a sphere, it focuses the light in a cone shape. Rectangular Light basically acts like a chandelier light covering objects in a room this can be used for overhead lighting down a corridor. The Sky Light comes from the scene background which can be used to set the mood, theme and style; but it can also be used to give players a feeling that the world keeps on going past their playable area.
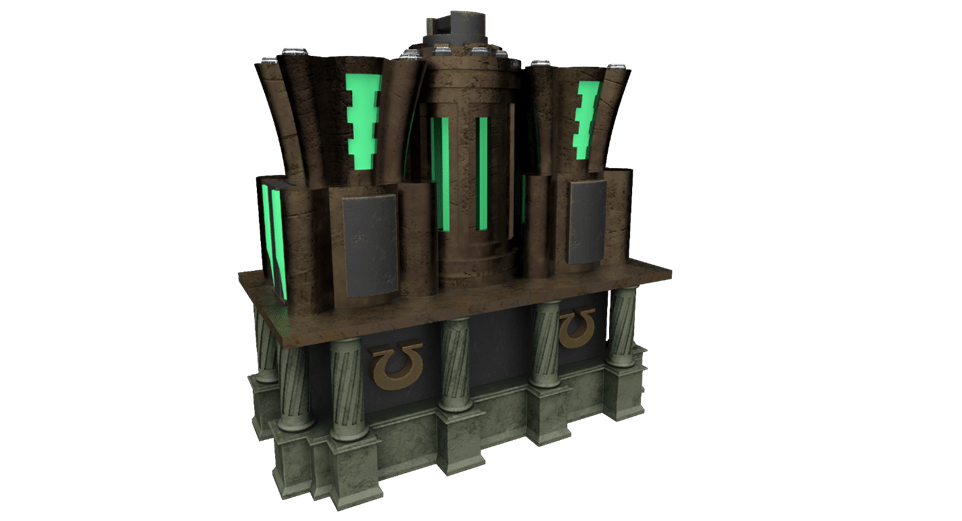
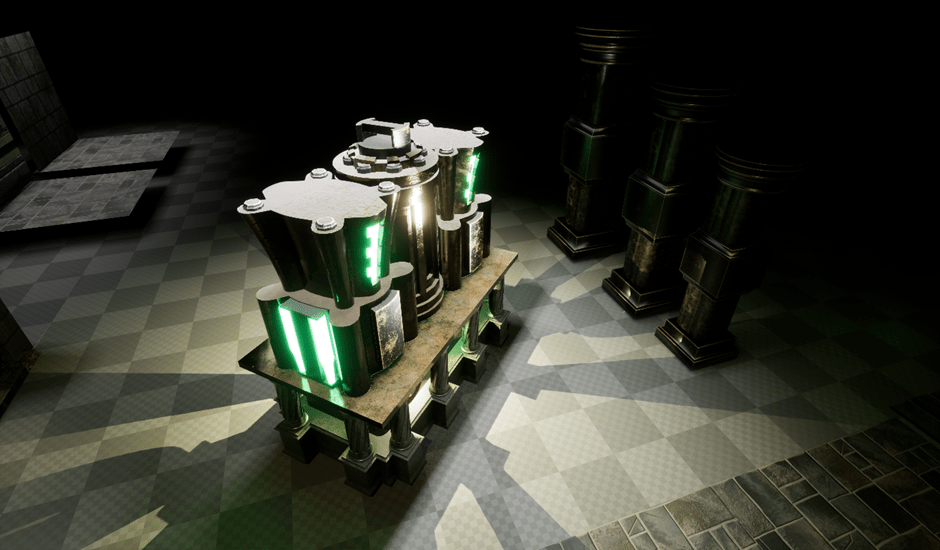
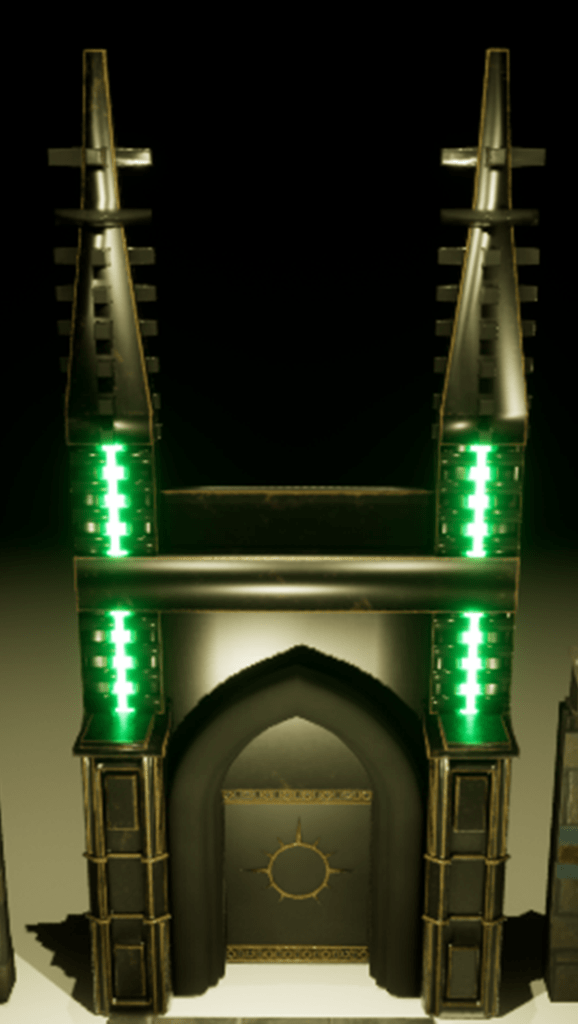
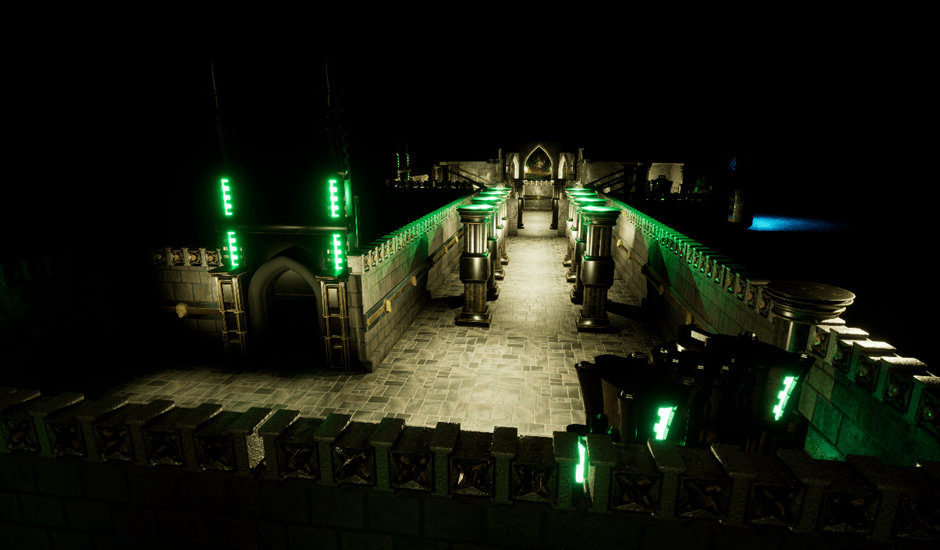
In my environment I wanted different lighting in, various areas. I used point lights with a green colour, on top of my pillars to reflect the energy of the shrine and this is to get the players to see the link of the colour of the energy powering the different areas. I switched the Directional light intensity to zero so that only the scene in my level was visible to the player. For various assets including the shrine, I added a green emission to parts of them, which brings the story together.
Week 11
In this week I Learnt about how to present my work to industry standard so that I can confidently show my project work.
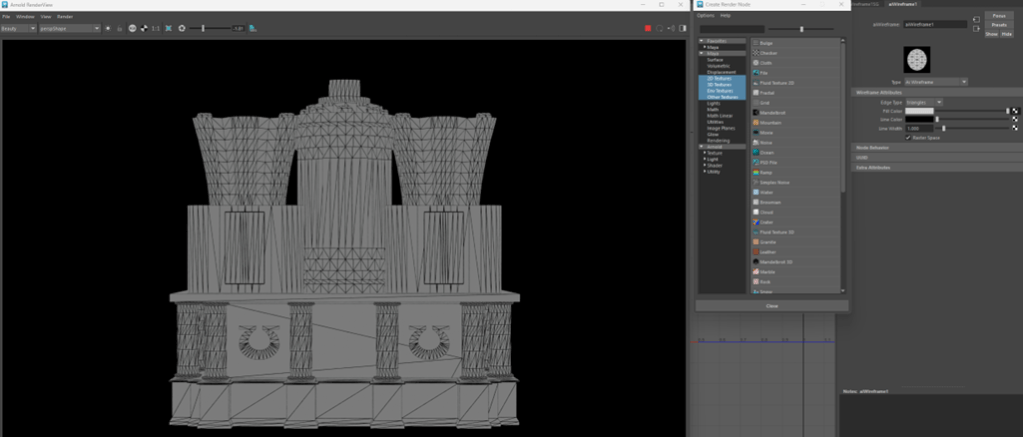
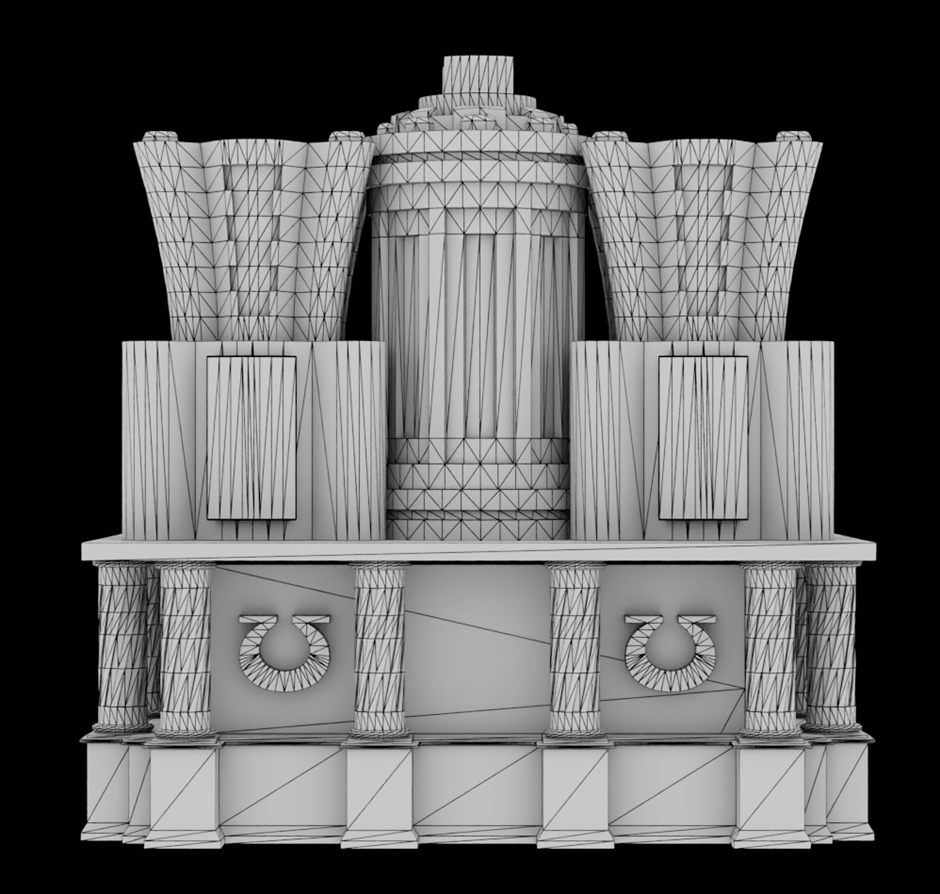
To assemble the shrine presentation sheet, I needed to create renders of the final model including an ambient occlusion wireframe. I also needed UV layout and texture maps.
In Maya I used the UV image export to store the UV map for the presentation sheet.
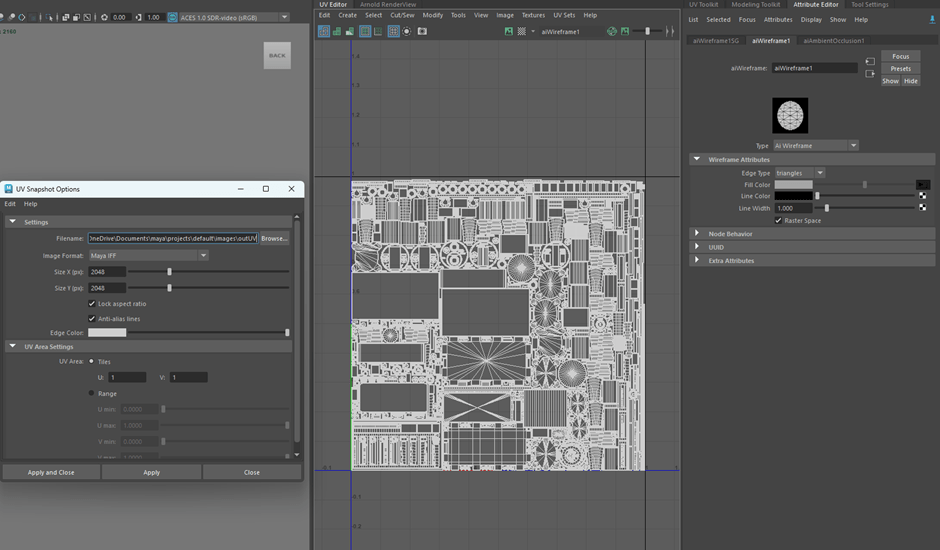
One the techniques I learnt about was to make an ambient occlusion render for my shrine, this can be done using the Arnold renderer in Maya.
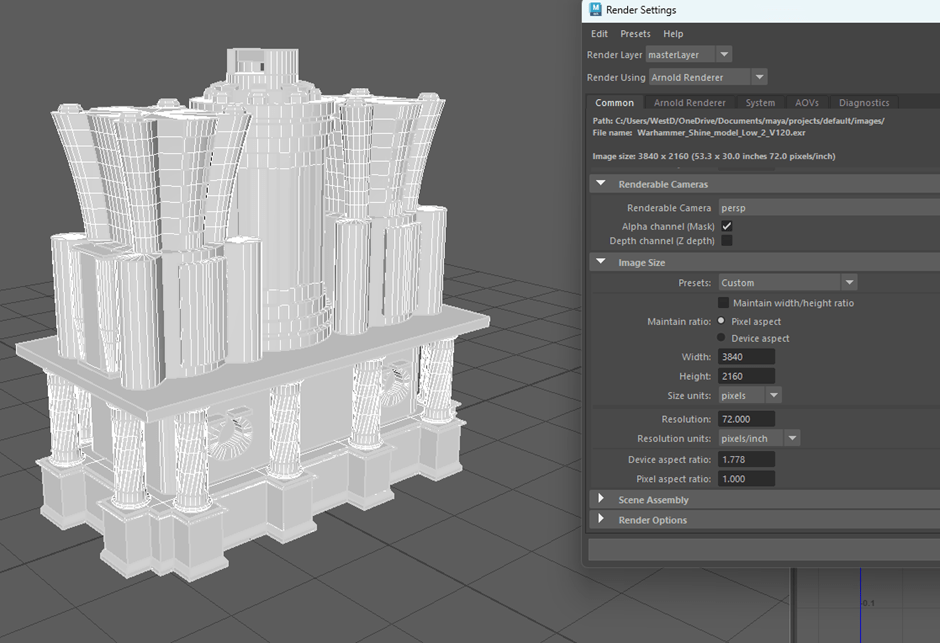
I followed the process from the mural provided. To start I changed the Arnold Renderer image size to 4k so that it was a high quality image.
I rendered a wireframe image firstly, changing the width of the line and then added ambient occlusion. I increased the samples which made the image clearer but this did increase the time it took to render.
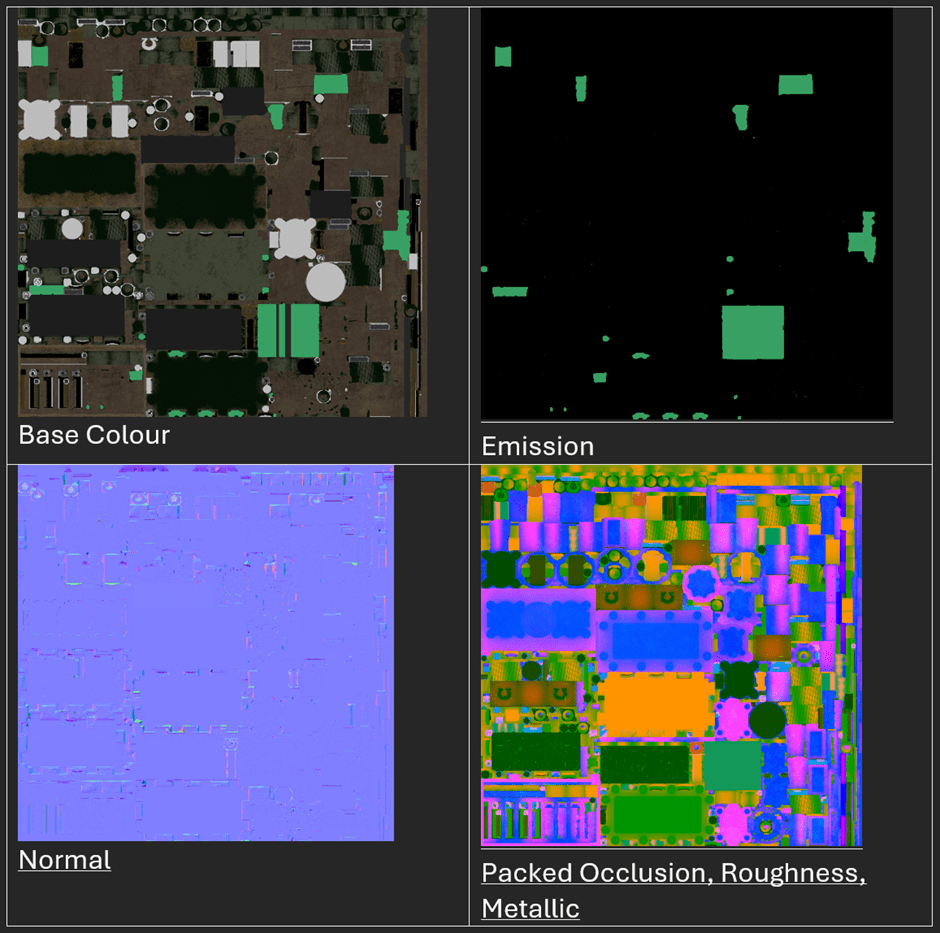
I exported the texture maps of my shine from Substance Painter using the Unreal Packed settings which produces the 4 maps required by Unreal Engine.
Rendering the best image of project work is a skill that I need to develop because it is so critical to working in industry. I decided to use substance painter to render my shrine model to clearly show all of its detail.
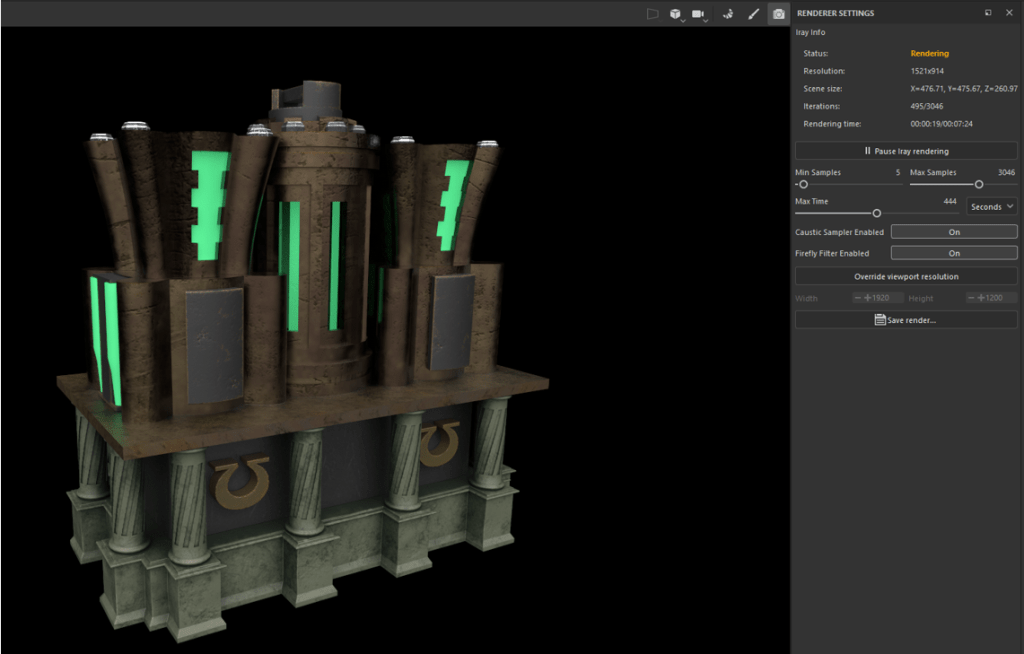
The renderer was easy to use but I found that it was best to increase the Max time setting to allow more samples to render.
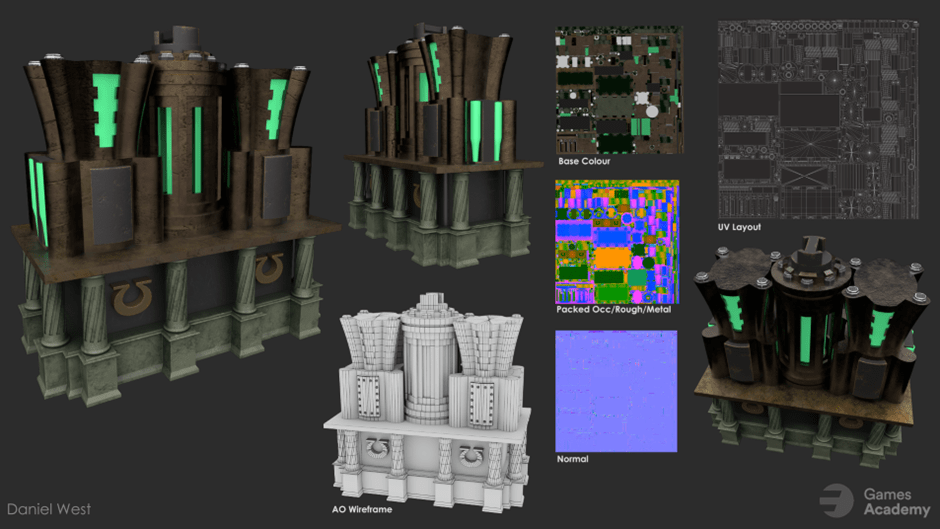
I found the presentation process valuable as I learnt a lot about how to show my work in professional way.
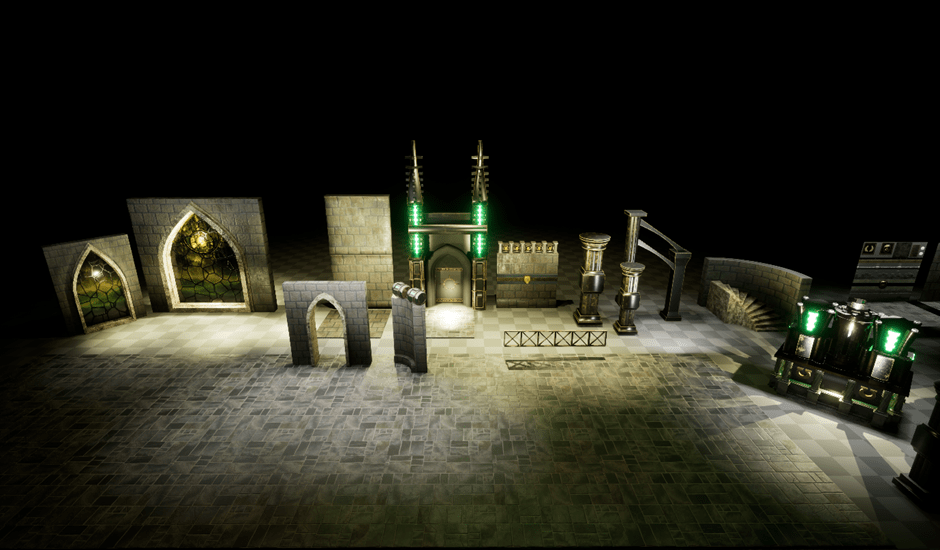
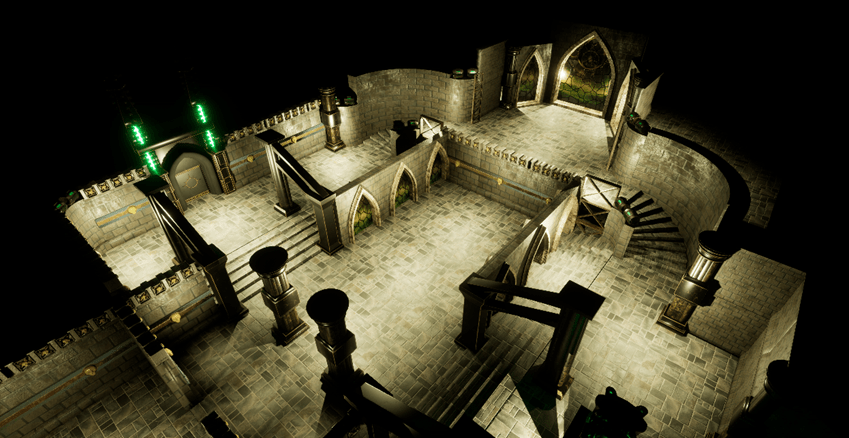
Presenting my modular set is important as it shows that I have produced my scene using modular assets because the environment is made up from repeated placing.
Stained Glass Window
I started to produce an arch shape from an extruded plane and used the convert to curve tool to make the outline edges into a curve so that I can form a sweepmesh.
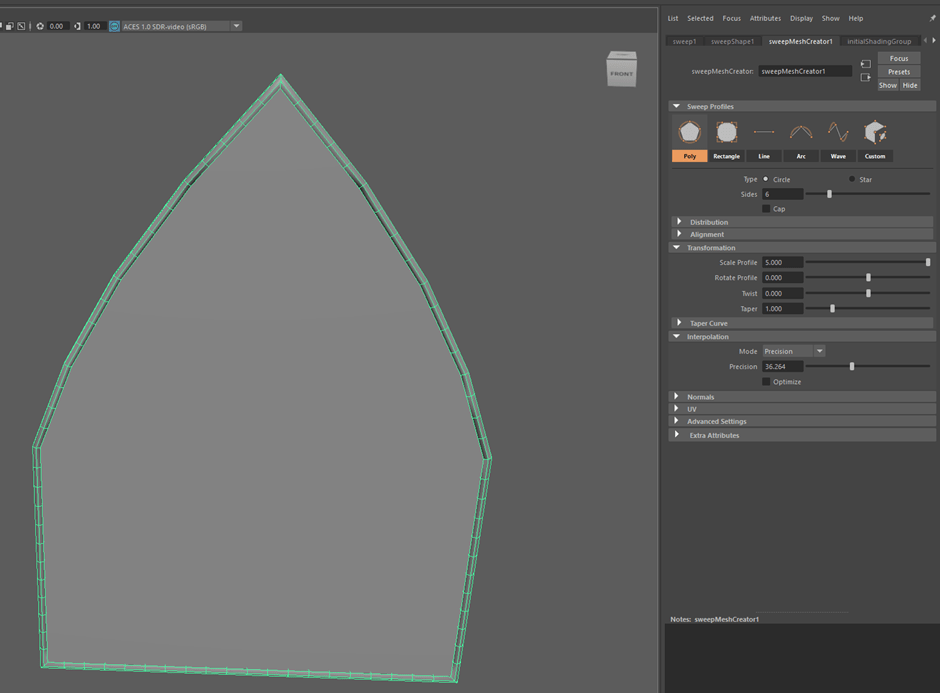
I used a copy of the shape to Boolean a wall, and although this worked well, I should have cleaned up the Ngons as these caused problems when unwrapping causing Maya to crash.
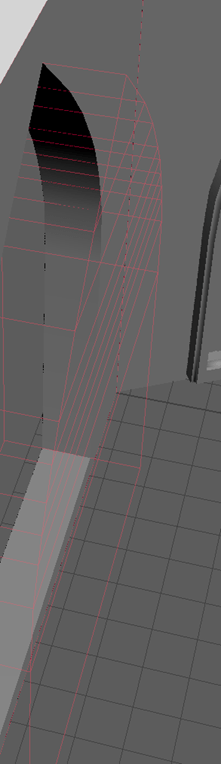
I wanted the frame design to have classic gothic architecture mixed with Warhammer iconography. To achieve I used a reference and traced around some of the design using a CV curve and then using sweepmesh to form its 3D shape.
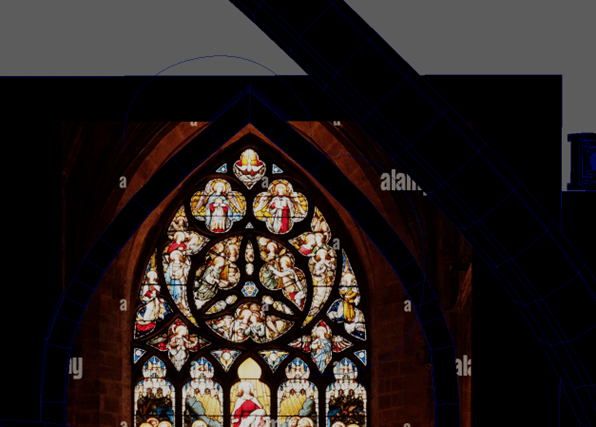
I researched how to create a stained glass window image and found a two useful video tutorials where one used Blender and the other was using Substance Designer.
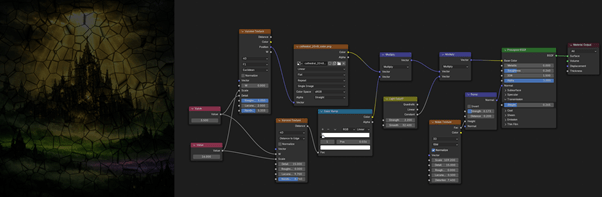
I tried both but preferred the way that the Blender image turned out as the Substance Designer version lost more detail. At first I thought I could create the image myself but because of the pressure of time I made a decision to generate an image using copilot. The prompt that I gave was to generate an image with a god light shining down on a misty landscape with mechanical gothic cathedrals in the background using purple and green.
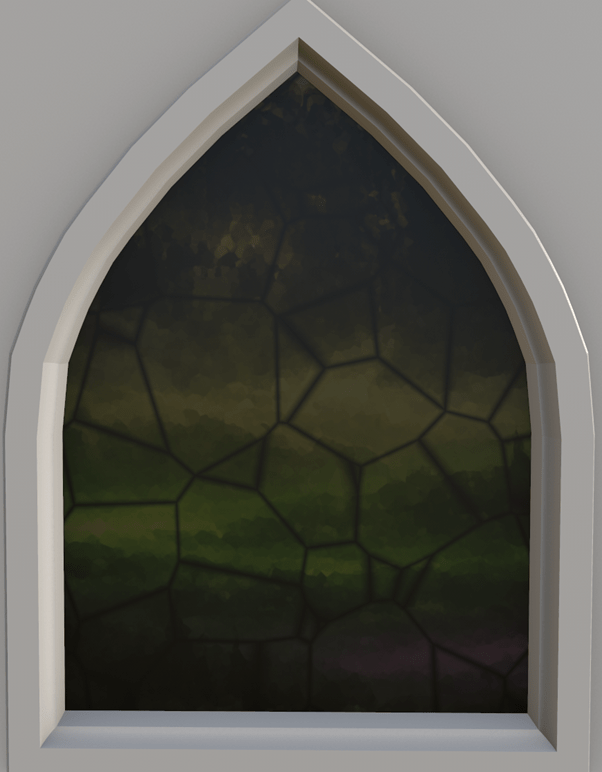
I put the image into substance painter but I wanted the lead to be 3D not flat and I found out that I could use a mask to sperate the lead tiling from window image.
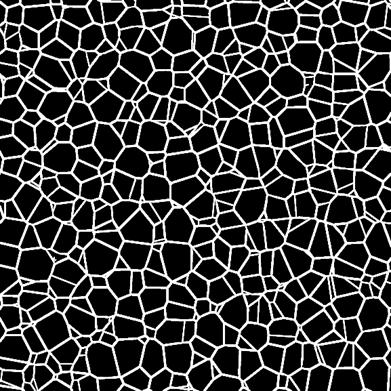
I used a standard metal material as a base for the lead and added the height control to raise the surface and this worked well.
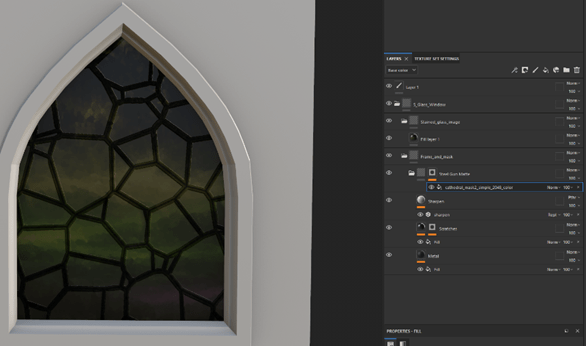
I used a standard metal material as a base for the lead and added the height control to raise the surface and this worked well.
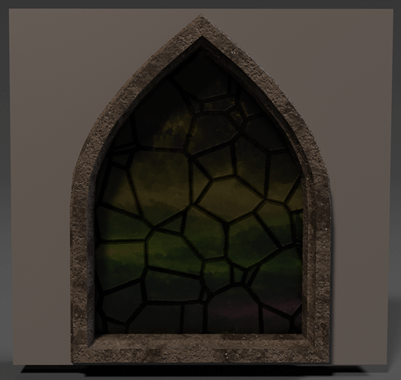
I finished by adding the stone material and made it look weathered. I left the main wall blank because I have planned to use my tileable wall material.
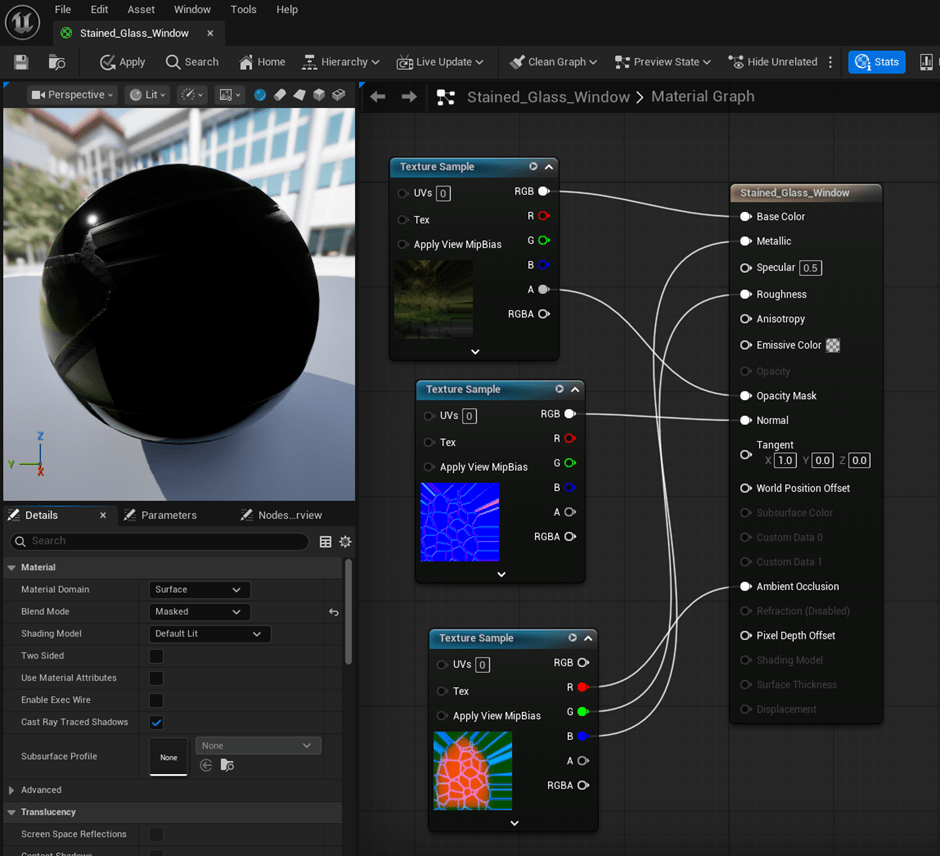
Now I exported the mesh and textures to transfer to Unreal Engine. I started to try and set up a transparent material for the stained glass window and at first I followed the Unreal engine documentation link from the learning space; however, while going through it I realised that it was going to make my material all transparent. This was not what I wanted to do as my material had both the glass and the lead trimming. I researched how to set up a material that kept the metal texture.
I found that the material blend mode needed to be set to masked so that the alpha in the base colour map would be connected to the opacity mask for how translucent it is. I realised this works because the substance painter base colour material has an opacity in the alpha channel.
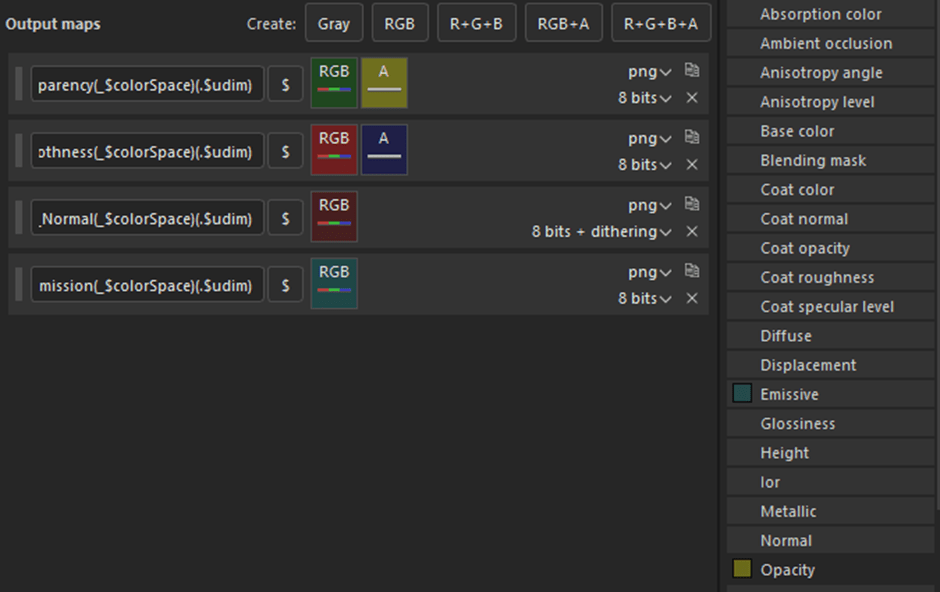
For the stained glass window, I found that the material blend mode needed to be set to masked so that the alpha in the base colour map would be connected to the opacity mask for how translucent it is.
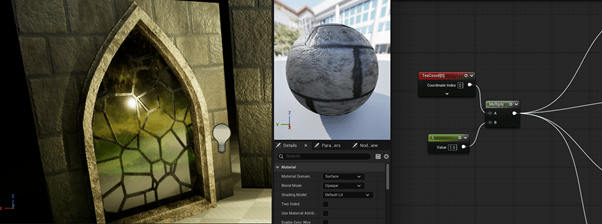
I applied the wall texture to the window walls, but the brick size was a different size to the other walls. I realised afterwards that I learnt about using material instances in week 9.
I was really pleased with how the windows looked together and the reflection of the player.

Bibliography
Adobe Substance 3D (2025). Texturing Stained Glass & Ceiling Paintings in Adobe Substance 3D Painter: Part 2 | Adobe. [online] Adobe Substance 3D. Available at: https://www.youtube.com/watch?v=NCkQ1eq8a-o [Accessed 30 Apr. 2026].
CGMatter (2020). Procedural Stained Glass Fast (Blender Tutorial). [online] YouTube. Available at: https://www.youtube.com/watch?v=TlfEdYqiLqE [Accessed 29 Apr. 2026].
MadyanStudios (2020). Substance designer: procedural stained glass [Using Flood fill node]. [online] YouTube. Available at: https://www.youtube.com/watch?v=EuNbDe9W-Bc [Accessed 30 Apr. 2026].
Epic Games (2025). Using Transparency in Unreal Engine Materials | Unreal Engine 5.7 Documentation | Epic Developer Community. [online] Epic Games Developer. Available at: https://dev.epicgames.com/documentation/unreal-engine/using-transparency-in-unreal-engine-materials?lang=en-US [Accessed 30 Apr. 2026].
Week 12
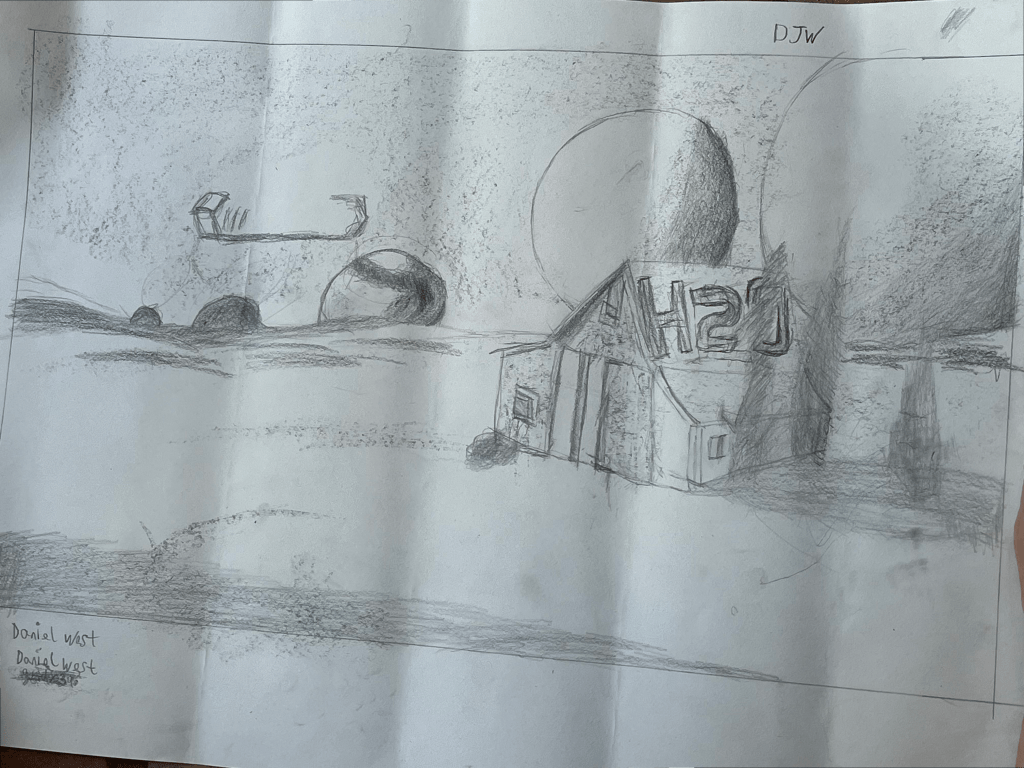
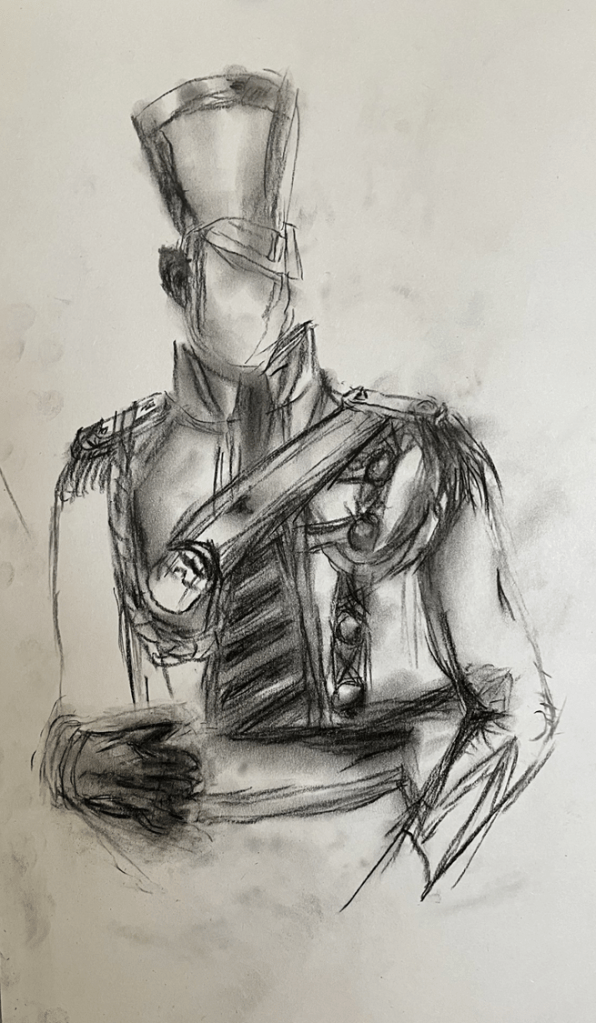
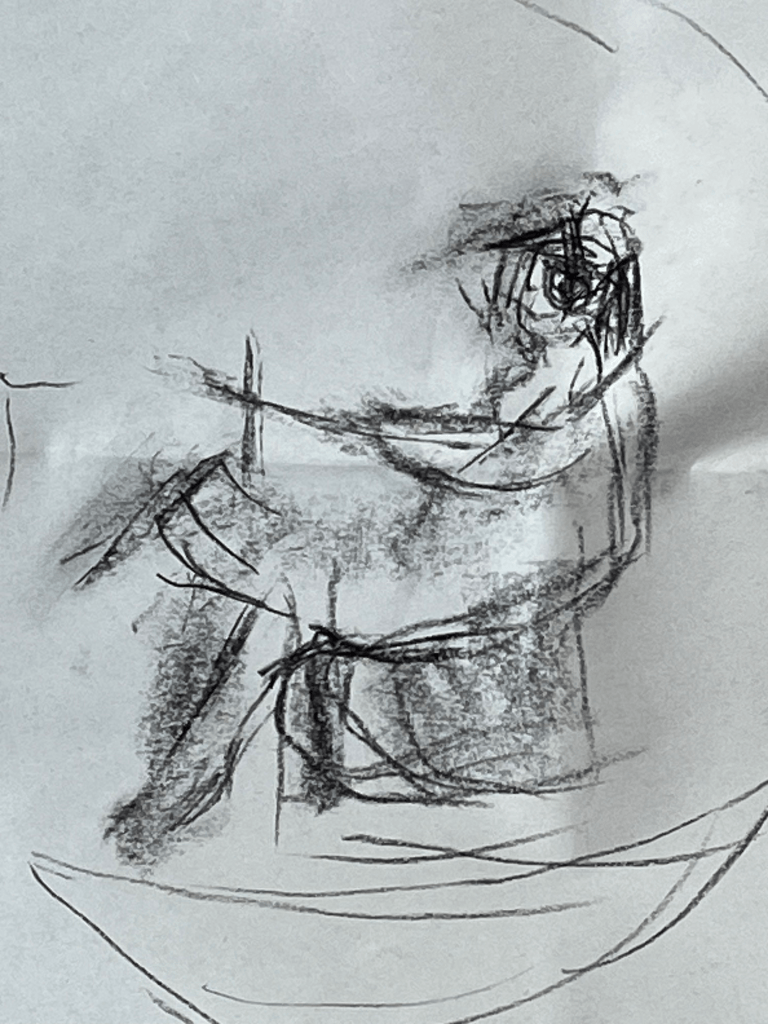
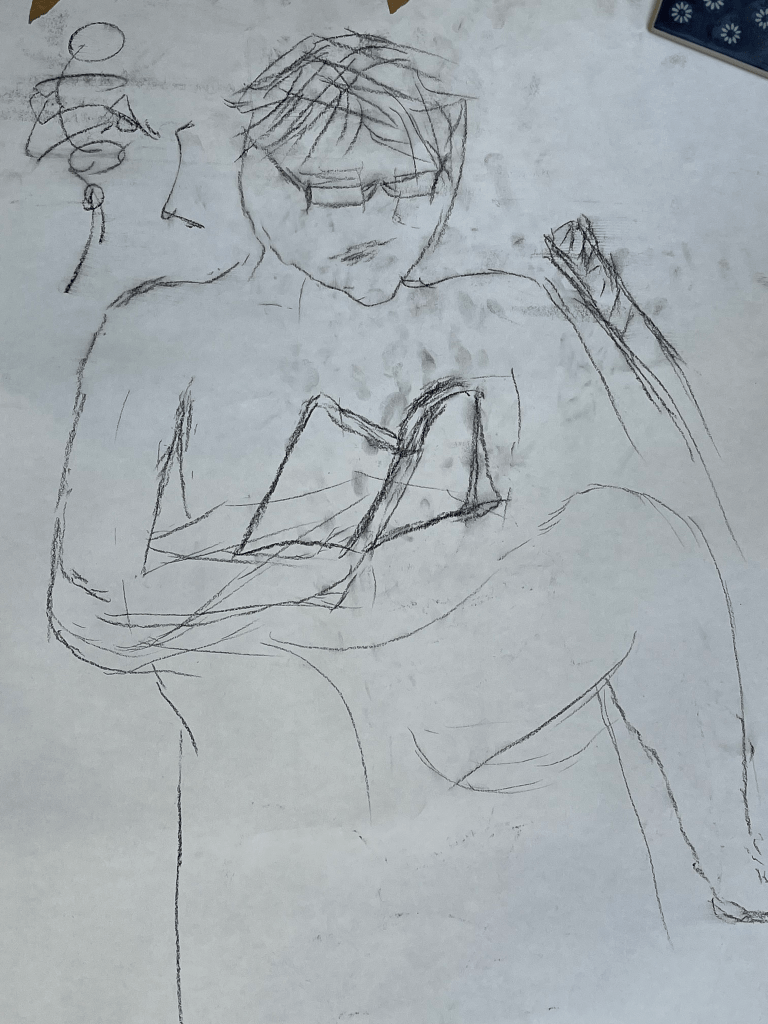
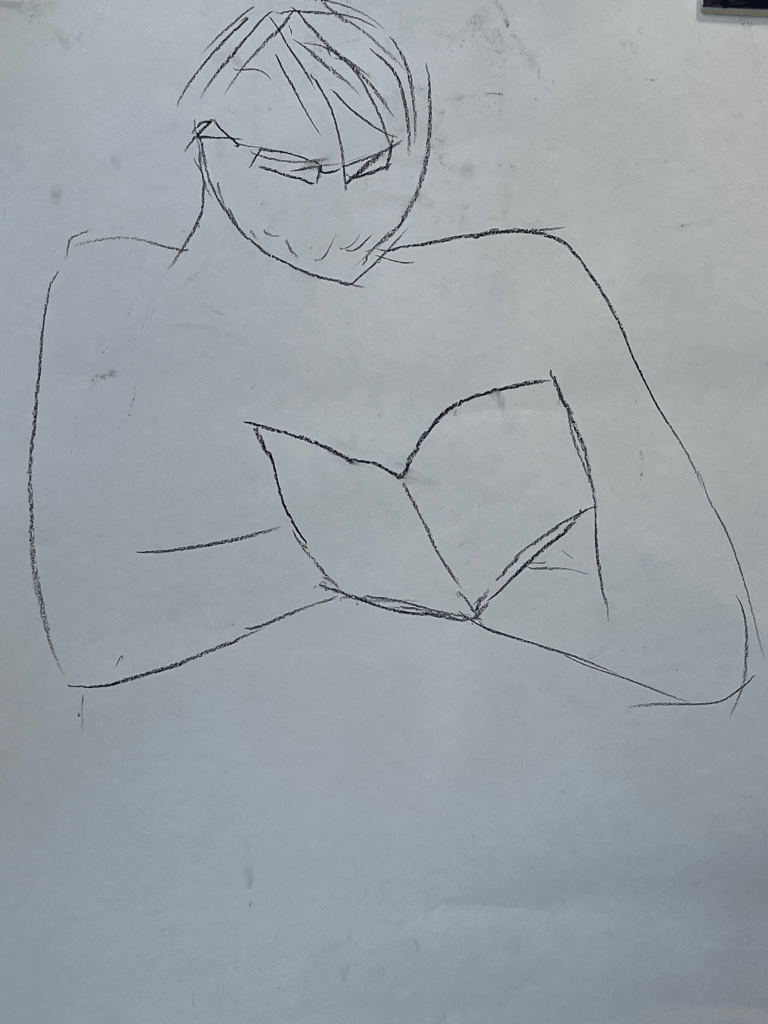
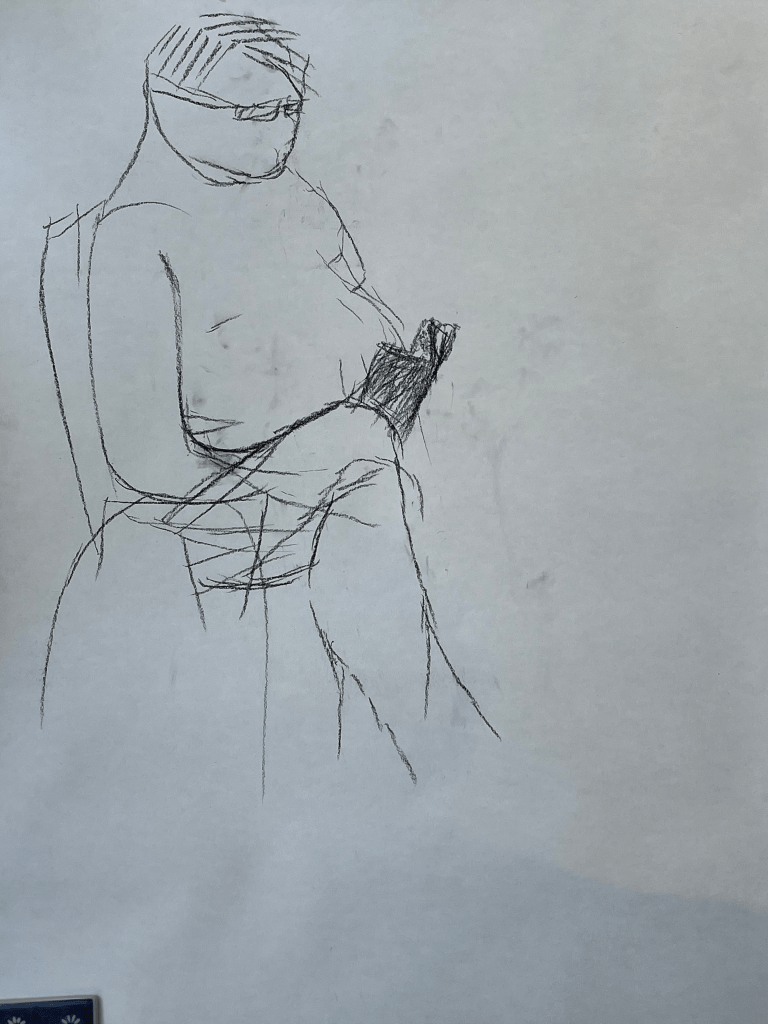
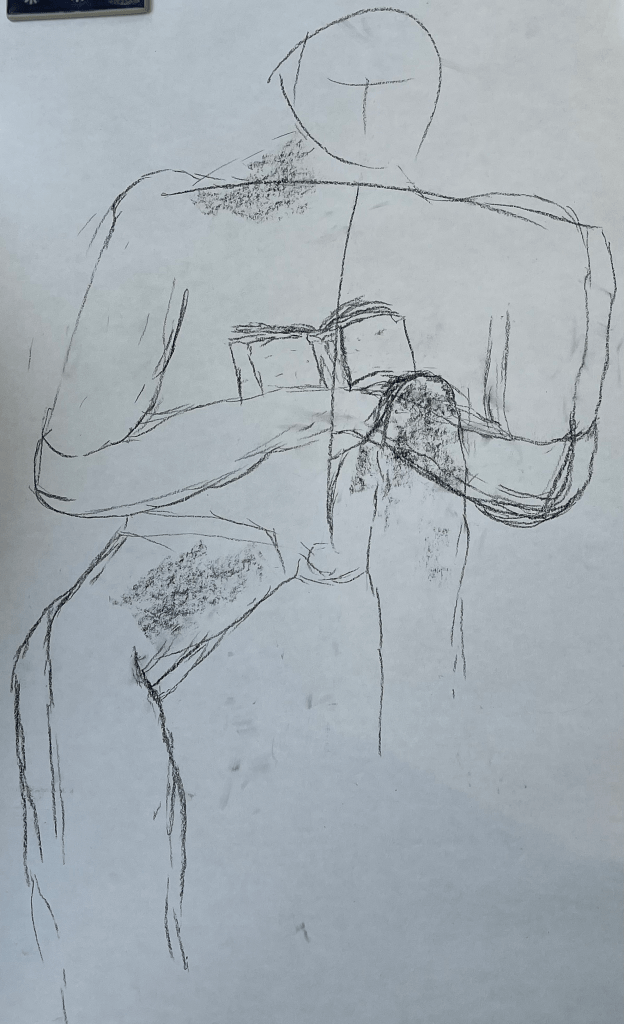
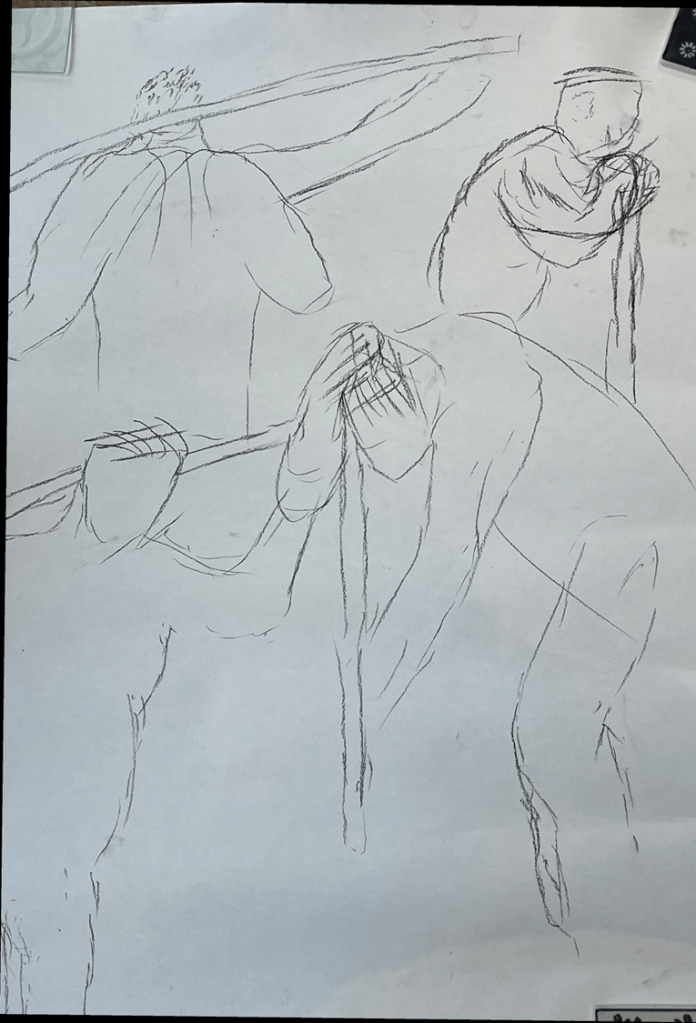
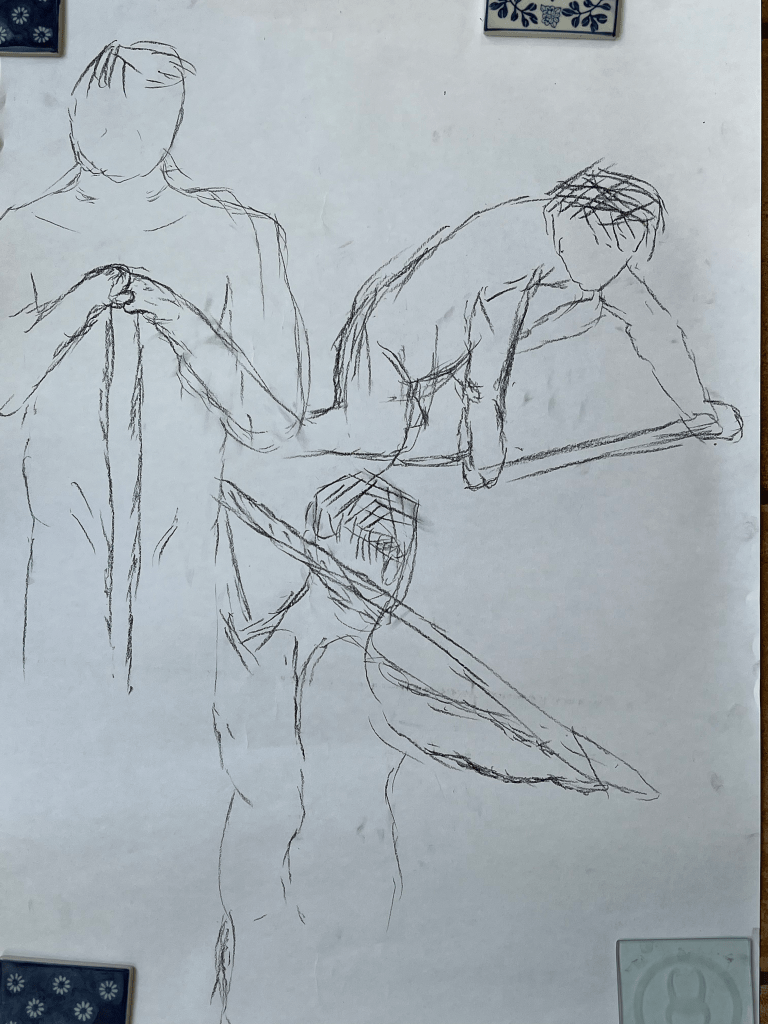
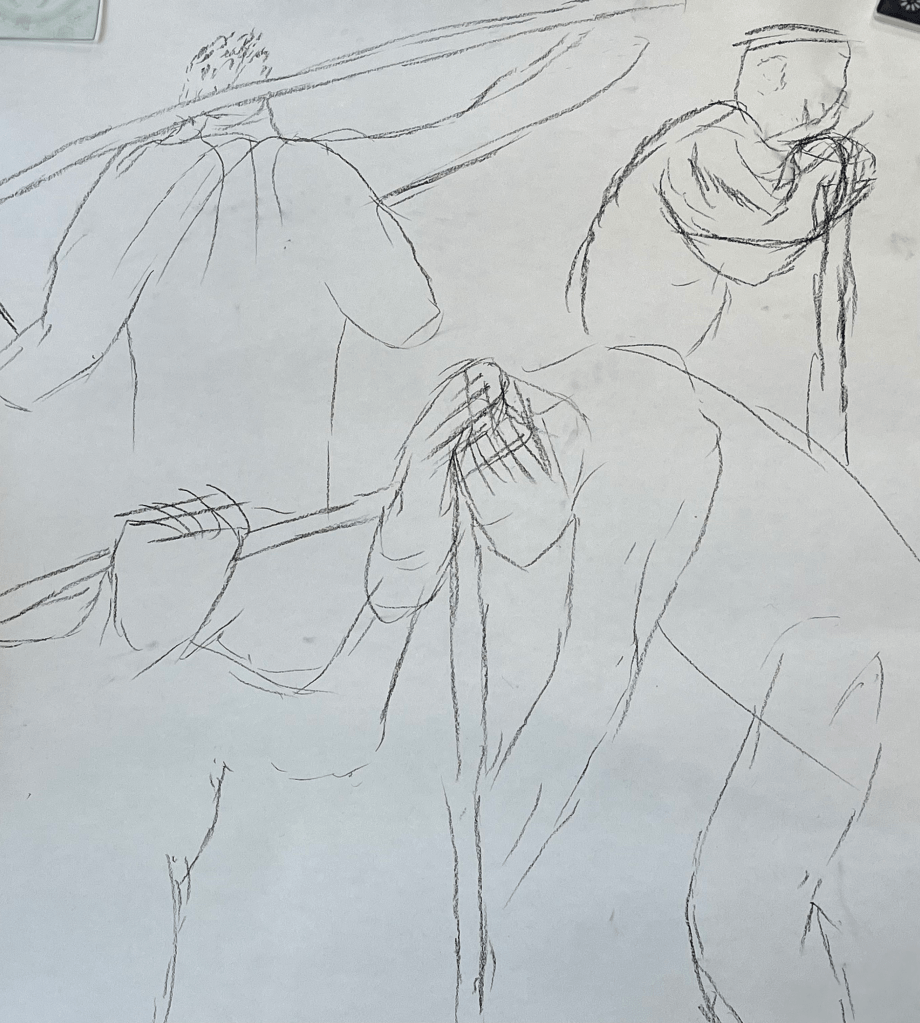
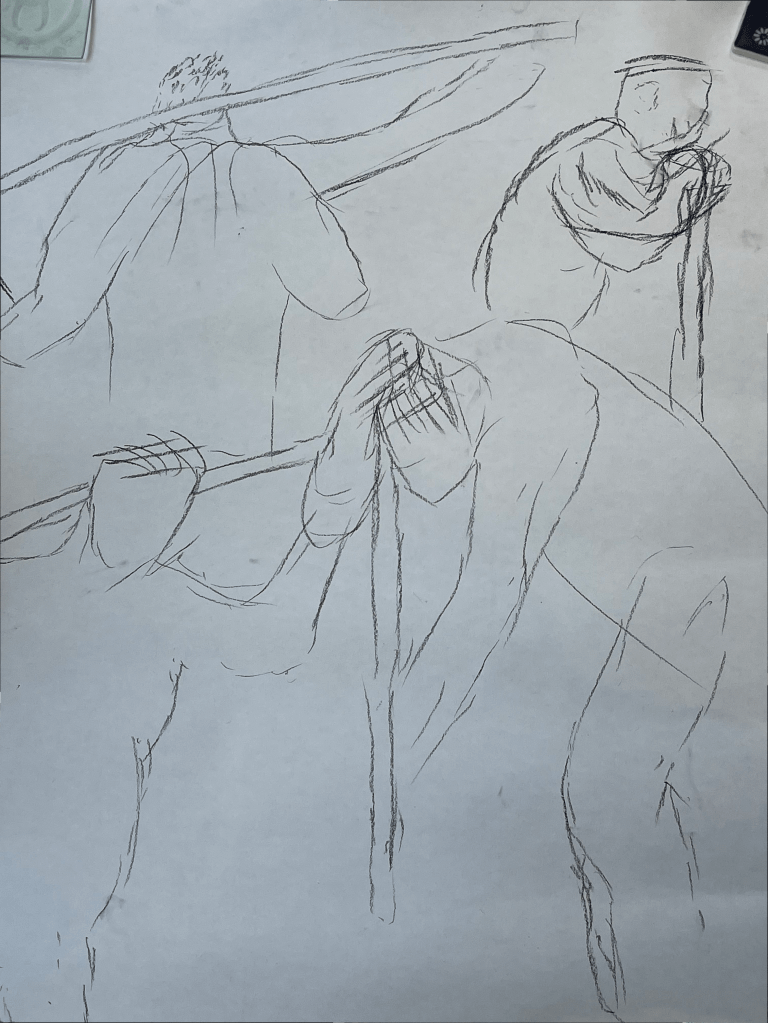
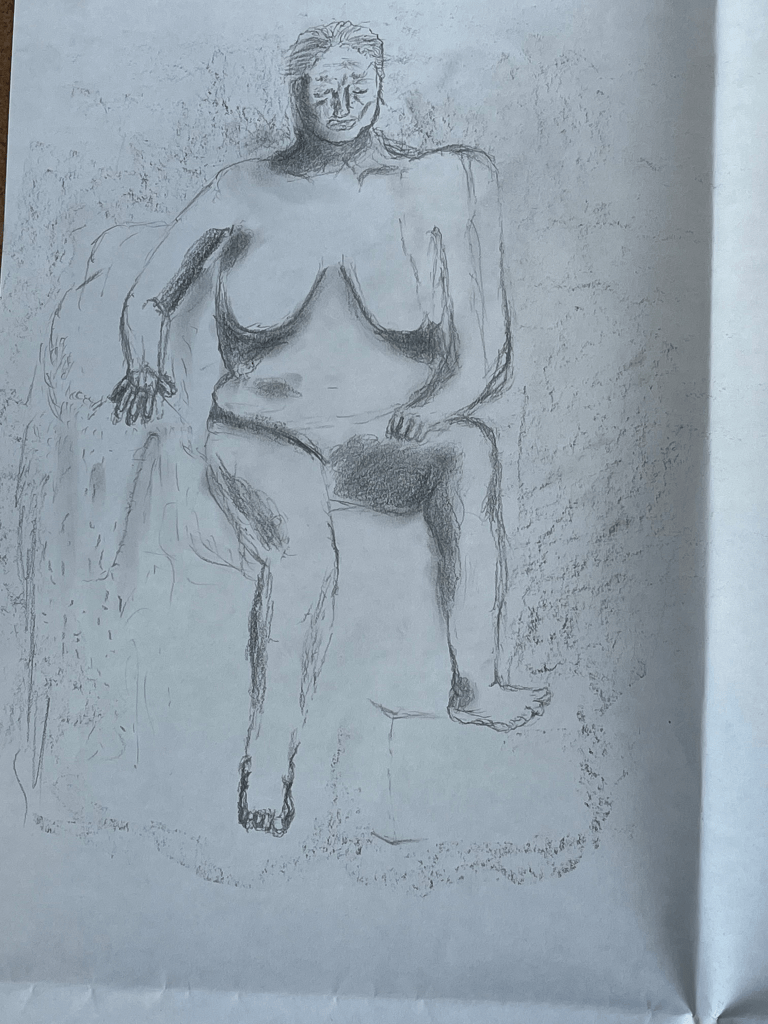
Drawing for Games Art Work